So, what’s for dinner?

That’s always a problem, right? Pasta, or . . . What else is in the kitchen? Refrigerator? And the time factor? Do I need to go to the store?

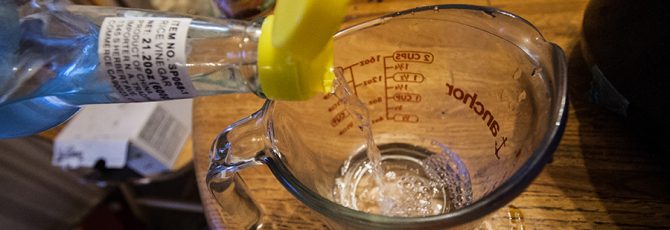
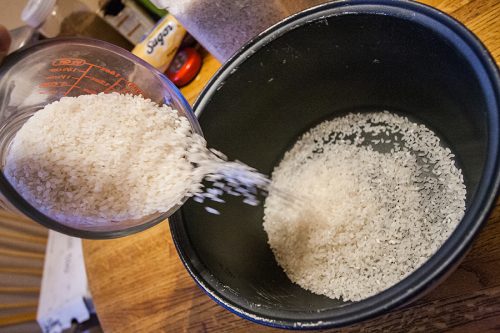
In my house, there are a few things always on hand: vegetables, maybe some meat (leftover, marinated or unprepared), always uncooked rice (and often times, leftover sushi/vinegared rice, plain recipe).

For me, the easiest meal is often times the humble rice bowl. I cook up some rice in my rice cooker, I turn it into sushi/vinegared rice (blog post). Then, do I want to make sushi? Or a rice bowl? Or maybe onigiri? Or maybe, a few sushi rolls now and rice bowls for lunch tomorrow, and some onigiri (rice balls) for later? The options are endless.

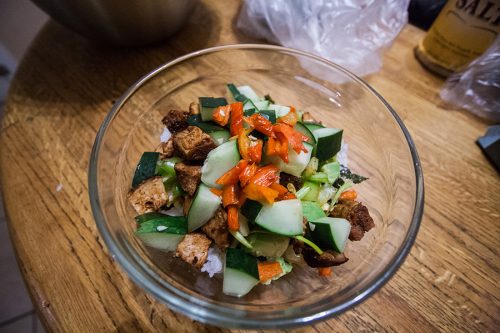
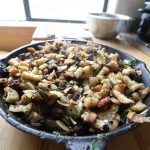
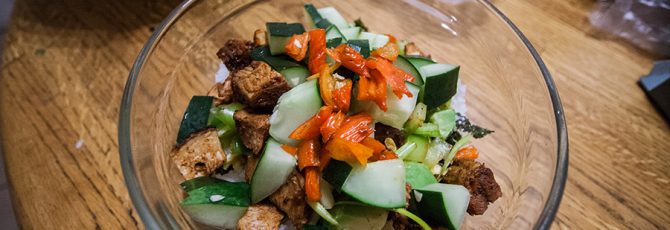
Peppers, grilled chicken, cucumbers and seaweed, at the very bottom, sit on top of rice in this rice bowl.

So, what is the rice bowl?

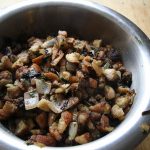
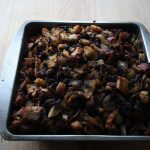
Well, it’s simple. You make some vinegared/sushi rice, put it in a bowl, cut up some veggies into bite-sized pieces, maybe cook up some meat and cut it up too, then throw it all on the rice.

Which veggies? Well, cucumbers are always nice, as are avocadoes. If you thinly slice, then deseed lemons, they are delicious. Being in New Mexico, I always add green chile peppers (unroasted) as well as jalepenos. Nori (seaweed) adds much needed taste. Green onions are also a good addition.

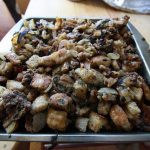
What else do you have? Throw it in there! Leftover steak? Cut it up, throw it in. Same goes for chicken, pork, or other meats.

Add some soy sauce, maybe some spicy/Sriracha mayonnaise, maybe some eel sauce, (Link to Amazon; once I make my own, I will post the recipe and update the link. Your local Asian store should have it for cheap.)

Bam! You’ve got a simple, relatively healthy dinner. Veggies, a little meat. Sure, the rice isn’t particularly healthy, but it’s frugal. Very, very frugal.

Avocados! Taste delicious in rice bowls, as do lemons. Seaweed is also a must.

(I buy sushi rice, Kokuho Rose variety, in 40 pound bags to be as frugal as possible. I store them in five-gallon buckets with lids, a carry over from my days as a homebrewer.)

There you go. Rice bowls. Simple. Delicious. Easy.

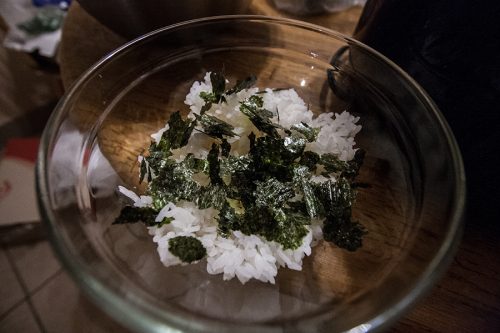
Seaweed (nori) is the first thing to go on top of the rice.

See all the photos on Flickr, in high quality.

Realized you don’t know how to make sushi rice? Here’s the recipe.

Want just the rice bowls recipe? Right here.

Simple rice bowls

Makes: as many as you have rice for

Ingredients

Sushi/vinegared rice
1/2 to 1/4 cucumber
1-3 green peppers
1 jalapeno (if you like it spicy)
1 piece of cooked meat (heated up if desired)
1/2 sheet of nori (seaweed sheets)
1 avocado
1 lemon, thinly sliced
All other vegetables, cooked or raw, as you see fit
Other ingredients as you see fit, or have seen in a sushi roll
Condiments such as eel sauce, Sriracha mayonnaise and eel sauce or cream cheese

Directions

1. Cut up the vegetables into bite-sized pieces. Cut the lemon slices into quarters.
2. Put enough rice into the bottom of a bowl.
3. Tear up the nori and place on top of the rice.
4. Put the cut up vegetables and meat, if using, on top of the nori, which is on top of the rice.
5. Heat up in the microwave for 30 second to 1 minute if working with leftovers or desire it hotter
6. Add condiments over the top and enjoy.

Two Recipes for Some Thanksgiving help

Thanksgiving is right around the corner which means, if you have to cook any part of the meal, you’re scrambling for ideas, for  ingredients, for menu planning, for drinks, for the whole shebang.

I’ve been there before and I’m going to be there again this year which means I’m scrambling as well.

I know a few parts of the meal ‘m going to be making already. Obviously, there’s the turkey. That’s a given. Then there’s the gravy. (Here’s the full recipe.) That’s something where the majority can be made ahead of time.

Then there’s the stuffing which I rarely stuff inside of the turkey. (I like to put a few lemons, maybe a lime, some apples, maybe an orange, in the bird’s cavity.)

I personally make a sage sausage stuffing with sourdough bread and bake it in the oven. This makes it toasty and more delicious.

There’re two options for the sage sausage. Either, make it yourself or just buy it. When it’s on sale, I buy it. When it’s not, I make it myself with fresh sage which I then dry in the oven.

There you go. Two great options.

I highly suggest you take my advice on the gravy.

Either use the links above or see the recipes below.

Make-ahead turkey giblet gravy

This make-ahead gravy assures there will be plenty for the meal and beyond
Course: Side Dish
Servings: 1 quart
Author: Wheeler Cowperthwaite

Ingredients

  • 1/2 cup butter More as required
  • 1/2 cup flour More as required
  • 5-6 cups water
  • Turkey giblets heart, liver, gizzard (Chicken giblets work also)
  • 6-10 pepper corns
  • 1 Turkey neck
  • 2 bay leaves
  • 1 carrot
  • 1 onion
  • Salt to taste
  • Turkey pan drippings
  • 1-2 cups Optional: 1-2 cups white or red wine More as required for deglazing
  • 1-2 cups Optional: Chicken or beef broth
  • Optional: 1 celery stick

Instructions

  • Put the water in a medium pot on high heat and set to boil.
  • Add the turkey neck, all giblets (chicken giblets also work), bay leaves and pepper corns to the pot of water.
  • While the water comes to a boil, cut the carrot and onion into quarters and add to the pot.
  • When water boils, cover, turn heat on low and simmer for at least 1 hour but preferably for 2 and 1/2 hours or longer. The longer the simmer, the better the stock.
  • While the stock simmers, either combine the butter and flour in a small bowl or put a skillet on medium heat, put the butter in the skillet and slowly whisk in the flour. Continue to whisk until it begins to turn golden brown. Remove to a separate bowl. This is the roux.
  • When the stock is done simmering, strain the stock and return to the pot it was simmered in. Add chicken or beef stock, if using.
  • Remove the turkey neck, heart and liver from the strainer. Remove the meat from the neck and finely mince. Finely mince the heart and liver. Add back to the stock and throw the rest of the material in the strainer away.
  • Add the roux to the stock. Stir until well combined. Add wine, if desired. Put on low heat and simmer if the gravy is too thin or make and add more roux.
  • If using turkey and pan drippings: Once the turkey has been removed from the pan, add a little water or wine, depending on how much liquid is in the pan, and deglaze over a medium-high heat, scraping the browned bits from the bottom.
  • Add the pan drippings to the gravy and stir until well combined. A little more flour may be required to be added.
  • Freeze or put in the refrigerator if being made significantly ahead of the serving time.


HOMEMADE SAGE SAUSAGE STUFFING

The sage sausage

Ingredients

1 lb ground pork or beef or other ground meat(s)

½ teaspoon ground coriander seeds

1 teaspoon salt

1-3 teaspoons dried, rubbed sage

½ teaspoon black pepper

Directions

If drying fresh sage, put sage leaves on a cooking sheet lined with parchment paper for 1-2 hours at 150-180 degrees Fahrenheit.

Mix the meat and spices, possibly by hand, until well combined.

Refrigerate overnight or cook immediately.

Sage sausage stuffing

Ingredients

8 cups sourdough bread cubes, dime to quarter sized pieces, which is a little under a pound and

half. Rye or whole wheat also make for good stuffing)

1 lb. sage sausage

1 cup bok choy (or other vegetable of one’s choosing, such as celery)

2 chopped medium onions

1-2 cups minced parsley

Directions

Preheat oven to 350 degrees if any of the stuffing is to be baked.

In a large skillet (12 inches), cook the sausage, separating it into quarter-sized pieces. Once it is almost done cooking, remove the sausage into a bowl.

Brown the onions and bok choy (or other vegetables as desired).

Add the sausage back into the skillet, as well as the cubed bread. Mix and continue to cook over medium-high to medium heat, until the bread begins to heat through.

Stuff the turkey with the stuffing or put the stuffing into baking dishes.

If baking the stuffing alone, bake at 350 Fahrenheit for 40 minutes with a tinfoil covering.

Remove the tinfoil covering and continue to bake for 20 minutes.


Making sushi rice

There are two subjects here: the rice used in sushi and how to prepare that rice, once cooked, into sushi rice.

Pouring the rice into the rice cooker.

The first deals with brands and varieties, that is, what type of rice to use. The second is purely recipe and technique, that is, how to make the sushi, or vinegared, rice.

By no means do I claim, proclaim, profane or otherwise pretend to be some kind of expert on rice, sushi, or the rice used in sushi. However, the topic has been written about multiple times. My takeaway was Kokuho Rose. I’ve grown so fond of it that I had to take a more cost-effective solution to buying it, mainly, 40 pound bags. It’s become my favorite white rice.

My default brown (long grain) rice is whichever five pound bag of (brown) jasmine rice I’m currently working through.

The great thing about making vinegared, or sushi, rice is it goes fantastic in rice bowls or really, anything. Then again, I like vinegar.

The rice question

The basics are, the rice used in sushi is either medium or short grain. If you look on the internet, you will find that the answers go either way. Koda Farms, who grows Kokuho Rose (a variety only grown by them) claims that short grain is should never be used. The Kitchn proclaims short grain is sushi rice.

So, this is all confusing. Japanese style medium-grain or short grain rice seems to be the answer. (Japan, for the most part, does not export its rice).

Try out different varieties/brands and find what you like. I know what I like. (I buy the stuff in the red/pink packaging).

Making sushi rice

When it comes to making the rice, I suggest using a rice cooker, especially because they are both so cheap and because they make cooking rice so easy, and perfect.

But what makes vinegared, or sushi, rice, special? The vinegar! And sugar. And salt.

(Use a rice cooker. Seriously. So much easier.)

So, you get your rice cooking (for what I use, the ratio is 1 and 1/4 cups water to 1 cup rice, meaning, for two cups of uncooked rice, you need 1 and 1/2 cups water in the rice cooker) and then move on to making the vinegar solution.

For the purposes of this post, as well as the recipe, the quantity will be two cups of uncooked rice.

I’ve found that heating the vinegar up in the microwave is the easiest way of getting the sugar (1/4 cup) and the salt to dissolve. It should be noted, however, that I just wing it with the salt and sugar. I literally just pour some of both in and call it good.

Another point of confusion is the washing of the rice. Many claim this is essential. I notice no difference with the rice I buy.

All that being written, here’s how to make sushi (vinegared) rice.

For just the recipe, it’s housed on the main website, here.

Ingredients

2 cups uncooked rice

2 1/2 cups water

1/4 cup sugar

1/2 cup rice vinegar

1 tablespoon salt

Directions

In a measuring cup, mete out 2 cups of uncooked rice

Wash the rice if desired, until water runs clear.

Pour uncooked rice into rice cooker.

In a measuring cup, Measure out 2 and 1/2 cups water. Pout into rice cooker.

Close rice cooker and turn on.

While the rice cooks, measure out 1/2 a cup of rice vinegar in a microwave-proof container, if possible.

Add the sugar and salt to the vinegar. Mix to combine.

Heat the vinegar up in the microwave, while mixing periodically, until all the sugar and salt is dissolved. Once dissolved, move it to the freezer while waiting for the rice to finish cooking.

Once the rice cooker either turns off or turns to warm, allow it to sit undisturbed for 5-15 minutes.

Open the rice cooker and quickly mix the rice one or twice. Replace the lid and wait another 5 minutes.

Remove rice from cooker into a large non-reactive bowl.

Pour the vinegar mixture over the rice and, with your rice spoon/mixer (oversized, flat spoon), lightly mix with a forward-pushing motion.

If making sushi, cover bowl with a wet towel and allow to cool further. If consuming rice bowls, consume!

See, or download, all the full-quality photos on Flickr.

(more…)