19. Your feet are going to swell

Maybe it doesn’t happen to you. Maybe it doesn’t happen to everybody and maybe it depends on where you go and the time of year but, me? My feet swell. Pretty bad, usually.

Other travelers I met, I’d mention it, and they had no idea what I was talking about. When I researched the topic, I found that I am not alone which means you may very well join my ranks.

The problem is we sweat. A lot. If I’m wearing my small backpack (which I cart around my camera and lenses in; I may reevaluate my camera options for a future trip), in Ho Chi Minh City in south Vietnam, pretty much as soon as I walk outside, I start sweating profusely. Within 20 minutes, the back of my shirt (cotton, which is the wrong choice) is soaked through. Completely. Wring it out and there will be lots of water on the ground wet. Hard to get dry again wet.

That’s a lot of water. Moreover, that’s a lot of salt water.

Depending on the time of year, where you go and if there’s a storm, humidity could be through the roof, further adding to your sweating problems.

To the north in Hanoi, in December, it’s not nearly as bad (a balmy 80 degrees) but it’s still a problem.

What to do about it? Drink lots of water or sports drinks (buy the 1.5 litter bottles) and eat lots of salty foods/snack foods. You need to replenish the salt your body is losing through sweat. When your body loses that salt, and it doesn’t get replaced, your feet swell.

Here’s where the real problem is: you drink 1.5 liter after 1.5 liter of water, and you never have to pee, because you’re sweating it all out. And you think that everything’s just fine, right? No headache. No other signs of dehydration.

Except your feet. They’re swollen. They’re giant. Problem is all that salt you lost that was not replenished by that purified water.

That’s where the salty snacks come in.

Sounds easy, right? Well, it doesn’t always work at that way, so be prepared if they do swell, and don’t be too horrified.

Find all of the travel lessons curated here.

Thanksgiving is tomorrow, which means you need recipes! I am here to provide a few. Click the links for the recipes.

Alternately, all the recipes are listed here.

The sides

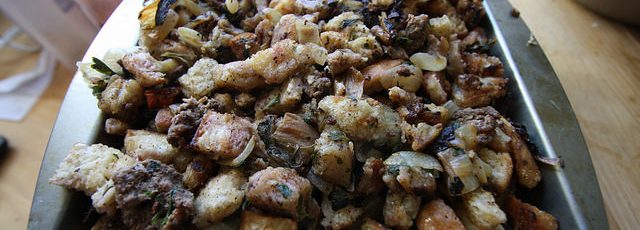
Sage sausage stuffing with sourdough bread.

Tastes fantastic.

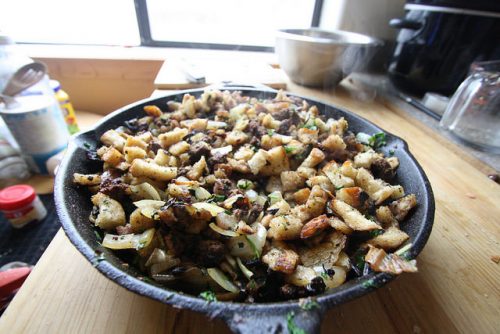
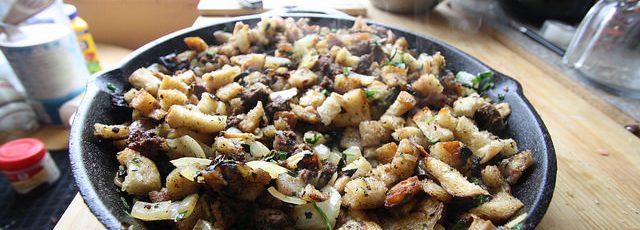
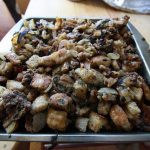
Stuffing before being placed in the oven. Although cast iron is great for baking, it tends to burn the bottom of the stuffing. Glass is preferred.

Stuffing before being placed in the oven. Although cast iron is great for baking, it tends to burn the bottom of the stuffing. Glass is preferred.

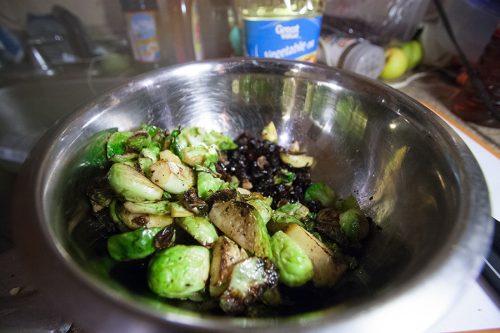
Bacon Brussels sprouts

If the skillet isn't large enough do it in batches.

If the skillet isn’t large, cook the sprouts in batches.

Ugly beans

The gravy

Make-ahead turkey giblet gravy

Make-ahead turkey giblet gravy infused with port

Dessert

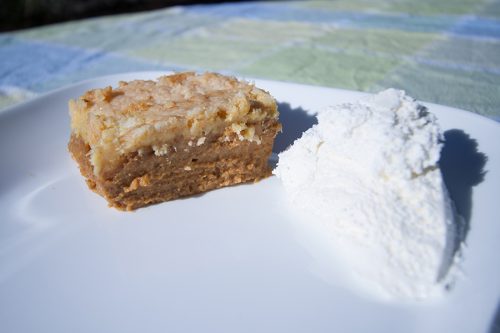
Pumpkin dump cake

pumpkin-dump-cake-with-cool-whip-900x600-3

Dump cake with non-dairy whipped topping, which looks like ice cream.

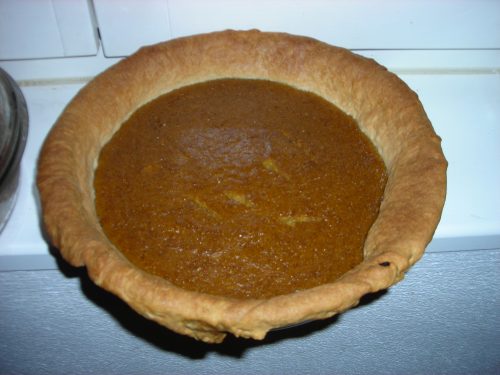
Cobbled pumpkin pie

For this dish, consider using the pumpkin mixture recipe in the dump cake.

Pumpkin pie after being baked.

Pumpkin pie after being baked.

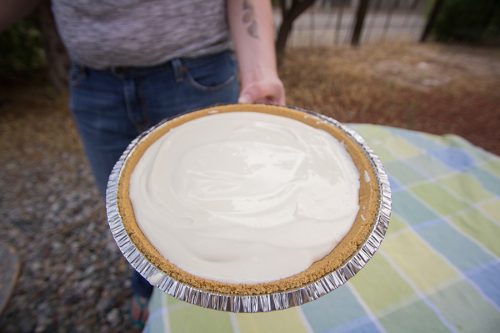
Key lime pie (needs to be frozen)

It's the pie! Pre-freezer, though.

It’s the pie! Pre-freezer, though.

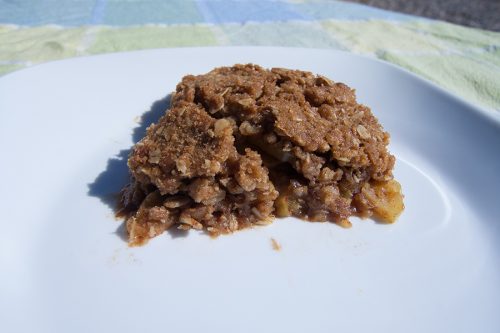
Boozy apple crisp

The boozy apple crisp is good. Not amazing, but good.

Really, just choose any dessert.

Drinks

The Holiday Mule

Sparkling Wine and Cranberry Cocktail

sparking-wine-cocktail-4-of-9-900x600

Cranberry juice and sparkling wine make a great combination for those who do not like the bubbly by itself.

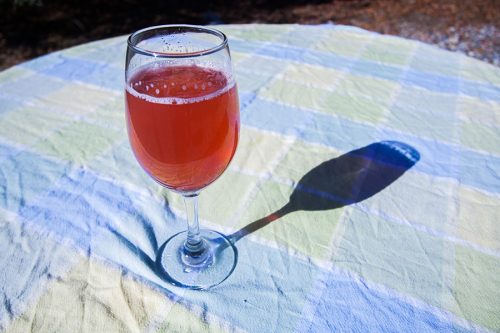
The Ginger Beer Shandy

The ginger beer shandy casts a pretty shadow.

The ginger beer shandy casts a pretty shadow.

Glühwein

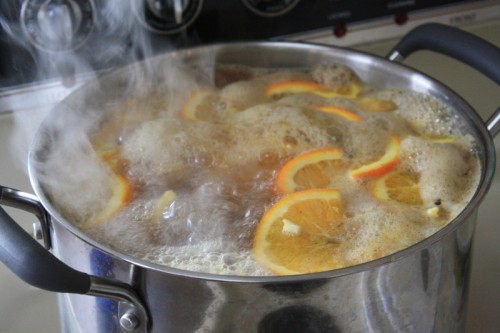
Way too hot. My bad! No boiling allowed!

Way too hot. My bad! No boiling allowed!

18. Wear a watch

Phones are great, except when you’re traveling and they’re confused as to where you are, or which time zone, etc. Or when they are low on battery life and all the electric outlets are taken. Or when you’re in the airport, for your layover, and you have no idea where they put the clock, you don’t have a SIM card for Taiwan, because you’re just traveling through to Ho Chi Minh City.

Sometimes, you want to make sure your phone is charged enough so when you do get in country, you an easily navigate so you can get to your hostel.

What’s better is to bring a watch that you can easily set for whatever the local time is, both while dealing with layovers on the way there and back as well as moving between countries.

This also means you don’t have to deal with either bringing your phone everywhere or making sure it’s always fully charged.

So, just bring a watch.

Find all of the travel lessons curated here.

thailand-phone-photos-3-900x600

This little guy broke the bench! Go gasoline!

17. Have open travel plans

As a solo traveler, having open travel plans was the entire intention I have when I go so Southeast Asia. I usually land in the big city, stay there for a few days, talk to or make friends with some fellow travelers and figure it out from there.

Sometimes that means making travel buddies and sometimes that means I’ll use the advice from other travelers (taken with a grain of salt) to plan the next leg of my trip.

Whenever people ask me about my travels overseas, this question somehow comes up. When I say that I went without a definite plan, usually, people are thunderstruck, an entirely unfathomable concept, especially without having friends or family in country.

Going without travel plans is totally worth it, though. Things changes. People change. New people come into your life. Sometimes, a whole part of the country will be stuck in a monsoon during the dry season and you decide to flee to where it’s not.

I did not come up with this advice myself. I actually read it on a travel blog that was focusing on Southeast Asia. It was so right.

Maybe you want to go to Chang Mai in the north, or Phuket in the south or maybe you want to join some people on a trip to Cambodia. Maybe in Cambodia, you want to travel with someone. Whatever it is, keep your options open.

Having open travel plans only goes so far. After I landed in Thailand in December, 2015, I was a little lost. It was my first time in Southeast Asia and I hadn’t traveled anywhere outside of work for quite a few years at that point. A few years before, I lived and worked as an au pair in Germany, and backpacked across Eastern Europe, so traveling wasn’t entirely foreign.

I read the travel book (Lonely Planet) and re-read it after arrived in Bangkok. Finally, I got a taxi to take me to the backpacker district, which, in the evening, is one giant party.

I took this advice so seriously that I did not have any hostel reservations. Because I was so smart and decided not to get my SIM card immediately switched over, I was wandering around, paper map in hand, trying to figure out where to spend the night. The first few hostels I found were full up.

Finally, I found an empty hostel that was cheap, super cheap, with some dude sleeping downstairs, acting, I guess, as the hostel guard. Fortunately, they had AC. They were so cheapskate that I was their only customer that night. I passed right out.

Really, I should have already had a hostel reservation, at least for the first night. I later on went to stay at a highly rated hostel (and suggested in Lonely Planet) where I met a bunch of great travelers.

One of those travelers is the reason I was not entirely screwed when I lost my only debit card, yet another lesson.

Find all of the travel lessons curated here.

thailand-phone-photos-1-1-of-1-900x600

Christmas decorations in Downtown Bangkok. Make sure your travel plans are open enough.

16. Pay (and plan) for laundry service

Regardless if your trip is two weeks or six months, you should be traveling pretty light. That means you are probably going to have to get laundry done while in country. But, that’s OK! It’s cheap and your clothes will often come back folded tighter than you thought possible.

Do not bring enough clothes to last you the whole trip. This does require a little bit of planning. You figure, it will probably take a day before its ready so you should plan it out a little bit.

It’s cheap, it’s easy. In the meantime, go buy a cool beer shirt, or a soccer polo for the local team.

The other thing to consider is bringing fewer clothes with the intention of buying along the way. For me, that usually means synthetic soccer or polo shirts.

Find all of the travel lessons curated here.

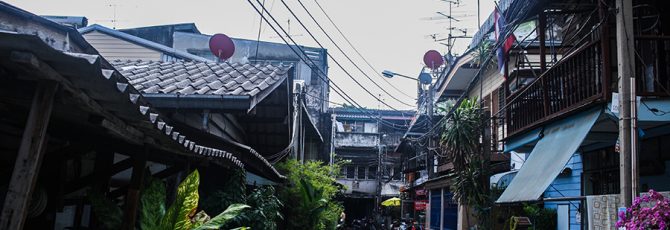
As much as I love this photo, it shows the limits of shooting in JPEG. (See the sky?) Often, down this kind of alley, you will find laundry shops. Taken in Bangkok on Dec. 4, 2015.

As much as I love this photo, it shows the limits of shooting in JPEG. (See the sky?) Often, down this kind of alley, you will find laundry shops. Taken in Bangkok on Dec. 4, 2015.

15. When you find good clothes, buy them

It’s going to happen. There’s going to be a vendor on the street and he’s going to have the perfect piece of clothing. (T-shirt, button up, dress, scarf, shorts, etc.) You’re going to buy one, just one, and think, at the end of my trip, I’ll come back here, and I’ll pick up a bunch more.

Except you’ll never be able to find him again. It will be like he disappeared into a side alley, down the gutter or was picked up by the trashmen. He will no longer exist and your chance to get more of those shirts will be gone, forever.

I should point out that my favorite button up shirts were all bought (cheaply) from a street vendor when I was traveling through Paris, France, during my time as an au pair.

There are a couple other things that should be noted when buying things from vendors, at least in Thailand. The first is, haggle them down (assuming no price tags). If you’re buying in bulk, use that as a bargaining chip and if they’re asking too much, and won’t budge, just walk away.

The next is, don’t be afraid to just buy shirts, pants, shorts, whatever it is, there. I realized far too far into my trip that a synthetic Bangkok soccer team polo was probably one piece of clothing I should have been wearing much of the time, rather than a cotton T-shirt.

Find all of the travel lessons curated here.

You got to have some fun, right? Taken in Angkor Wat, Cambodia, on Dec. 17, 2016

You got to have some fun, right? This is the synthetic soccer polo I should have first bought when I got in country. Taken in Angkor Wat, Cambodia, on Dec. 17, 2016

This is a French girl (some kind of physical education teacher) whom I was supposed to send pictures to. I forgot her name and have no idea where I put her email address. Woops! Taken in Angkor Wat, Cambodia, on Dec. 17, 2016.

This is a French girl (some kind of physical education teacher) whom I was supposed to send pictures to. I forgot her name and have no idea where I put her email address. Woops! Taken in Angkor Wat, Cambodia, on Dec. 17, 2016.

14. Consider bringing a duffel bag for the return trip

I don’t know how much shopping you plan on doing but you should really consider bringing a duffel bag (that is very small and lightweight when empty) on your trip or buying one in country.

The simple reasoning for bringing it is: it saves you from having to find one on those last days before you leave, when you’re trying to get all your shopping done.

I write a duffel bag because they’re just so much smaller and easier to deal with than a suitcase.

When it comes to the main travel bag, I’m a big fan of a big backpack. Mine has a sub-backpack that attaches to the front or, for shorter trips, detaches, making it perfect for backpacking.

I ended up using one of the bags I bought (shopping bag sized) as my second piece of checked luggage to store many of the scarves and shirts I bought over there. Fortunately for international travel, depending on the airline, you get two bags free, which is why I suggest the duffel bag.

Find all of the travel lessons curated here.

Two Recipes for Some Thanksgiving help

Thanksgiving is right around the corner which means, if you have to cook any part of the meal, you’re scrambling for ideas, for  ingredients, for menu planning, for drinks, for the whole shebang.

I’ve been there before and I’m going to be there again this year which means I’m scrambling as well.

I know a few parts of the meal ‘m going to be making already. Obviously, there’s the turkey. That’s a given. Then there’s the gravy. (Here’s the full recipe.) That’s something where the majority can be made ahead of time.

Then there’s the stuffing which I rarely stuff inside of the turkey. (I like to put a few lemons, maybe a lime, some apples, maybe an orange, in the bird’s cavity.)

I personally make a sage sausage stuffing with sourdough bread and bake it in the oven. This makes it toasty and more delicious.

There’re two options for the sage sausage. Either, make it yourself or just buy it. When it’s on sale, I buy it. When it’s not, I make it myself with fresh sage which I then dry in the oven.

There you go. Two great options.

I highly suggest you take my advice on the gravy.

Either use the links above or see the recipes below.

Make-ahead turkey giblet gravy

This make-ahead gravy assures there will be plenty for the meal and beyond
Course: Side Dish
Servings: 1 quart
Author: Wheeler Cowperthwaite

Ingredients

  • 1/2 cup butter More as required
  • 1/2 cup flour More as required
  • 5-6 cups water
  • Turkey giblets heart, liver, gizzard (Chicken giblets work also)
  • 6-10 pepper corns
  • 1 Turkey neck
  • 2 bay leaves
  • 1 carrot
  • 1 onion
  • Salt to taste
  • Turkey pan drippings
  • 1-2 cups Optional: 1-2 cups white or red wine More as required for deglazing
  • 1-2 cups Optional: Chicken or beef broth
  • Optional: 1 celery stick

Instructions

  • Put the water in a medium pot on high heat and set to boil.
  • Add the turkey neck, all giblets (chicken giblets also work), bay leaves and pepper corns to the pot of water.
  • While the water comes to a boil, cut the carrot and onion into quarters and add to the pot.
  • When water boils, cover, turn heat on low and simmer for at least 1 hour but preferably for 2 and 1/2 hours or longer. The longer the simmer, the better the stock.
  • While the stock simmers, either combine the butter and flour in a small bowl or put a skillet on medium heat, put the butter in the skillet and slowly whisk in the flour. Continue to whisk until it begins to turn golden brown. Remove to a separate bowl. This is the roux.
  • When the stock is done simmering, strain the stock and return to the pot it was simmered in. Add chicken or beef stock, if using.
  • Remove the turkey neck, heart and liver from the strainer. Remove the meat from the neck and finely mince. Finely mince the heart and liver. Add back to the stock and throw the rest of the material in the strainer away.
  • Add the roux to the stock. Stir until well combined. Add wine, if desired. Put on low heat and simmer if the gravy is too thin or make and add more roux.
  • If using turkey and pan drippings: Once the turkey has been removed from the pan, add a little water or wine, depending on how much liquid is in the pan, and deglaze over a medium-high heat, scraping the browned bits from the bottom.
  • Add the pan drippings to the gravy and stir until well combined. A little more flour may be required to be added.
  • Freeze or put in the refrigerator if being made significantly ahead of the serving time.


HOMEMADE SAGE SAUSAGE STUFFING

The sage sausage

Ingredients

1 lb ground pork or beef or other ground meat(s)

½ teaspoon ground coriander seeds

1 teaspoon salt

1-3 teaspoons dried, rubbed sage

½ teaspoon black pepper

Directions

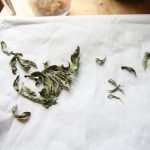
If drying fresh sage, put sage leaves on a cooking sheet lined with parchment paper for 1-2 hours at 150-180 degrees Fahrenheit.

Mix the meat and spices, possibly by hand, until well combined.

Refrigerate overnight or cook immediately.

Sage sausage stuffing

Ingredients

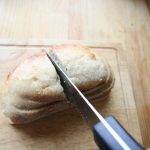
8 cups sourdough bread cubes, dime to quarter sized pieces, which is a little under a pound and

half. Rye or whole wheat also make for good stuffing)

1 lb. sage sausage

1 cup bok choy (or other vegetable of one’s choosing, such as celery)

2 chopped medium onions

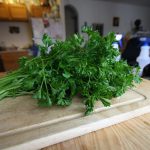
1-2 cups minced parsley

Directions

Preheat oven to 350 degrees if any of the stuffing is to be baked.

In a large skillet (12 inches), cook the sausage, separating it into quarter-sized pieces. Once it is almost done cooking, remove the sausage into a bowl.

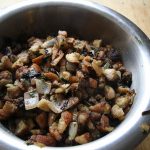
Brown the onions and bok choy (or other vegetables as desired).

Add the sausage back into the skillet, as well as the cubed bread. Mix and continue to cook over medium-high to medium heat, until the bread begins to heat through.

Stuff the turkey with the stuffing or put the stuffing into baking dishes.

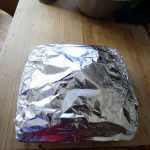
If baking the stuffing alone, bake at 350 Fahrenheit for 40 minutes with a tinfoil covering.

Remove the tinfoil covering and continue to bake for 20 minutes.


13. Consider your shoes and a hat

I’m by no means a monster of a man but I do have big feet, by some standards (11 1/2) and I have a large head. This means it was nearly impossible to find shoes or sandals in Thailand, when I needed to buy some for walking in the jungle, because everything was just too small.

The same went for hats. Almost all the hats I could find were just too small for my head.

My take-away? Next time, I’m bringing my own hat (you really need it) and I’m making sure to bring a pair of amphibious sandals or shoes with me because I know, as a large footed man, I’m going to be screwed otherwise.

The other thing to consider about your shoes is, bring something comfortable to walk in that can also stand the heat. That may mean shoes with socks, or just flip flops, or, whatever makes you feel good.

Find all of the travel lessons curated here.

That's a polish guy up ahead. We're in the jungle. Honest to god jungle. Stepped in muck so deep, nearly lost my sandal. Bring some amphibious shoes/sandals. Please. And consider a hat for your big, non-Thai head. Taken on Dec. 13. 2015.

That’s a polish guy up ahead. We’re in the jungle. Honest to god jungle. Stepped in muck so deep, nearly lost my sandal. Bring some amphibious shoes/sandals. Please. And consider a hat for your big, non-Thai head. Taken on Dec. 13. 2015.

Boozy apple crisp

I’m a big fan of the apple crisp. That should come as no surprise, considering I written about two crisps/hybrids and consistently use the crisp (aka crumble) topping as a basis in other recipes.

There’s the original, double sided crisp which is just a crisp on both the top and bottom and then there’s the hybrid cobbler crisp with raspberries.

I’ve since used the crumble/crisp topping in an apple coffee cake (the crumble/crisp is also called a streusel). It’s the search for inspiration for that coffee cake that brought me to a recipe by Monique at the Ambitious Kitchen.

There were two things I took away from her recipe, both of which I incorporated into the apple coffee cake: the addition of liquor in the baking process and mixing the streusel topping into the middle.

I recently made the Ambitious Kitchen crisp with the addition of, and more, liquor than called for in the original recipe and eliminated the nuts.

I also substituted my streusel topping for hers, which I found to have too much sugar. Finally, I used semi-sweet apples from my co-worker’s orchard.

Finally, I didn’t deal with the the vanilla bean the recipe and conceded to the use of butter on the apples. I don’t know that it added anything and I found the apples needed a bit more sugar.

My last note is that it really does need to be heated back up before serving and it might actually be better a day later, after being reheated.

With that, I give you my modified recipe:

(If you want just the recipe, it’s on my website, here.)

Ingredients

Streusel topping

1/2 cup (1 stick) melted butter

3/4 cup packed brown sugar

1 cup whole wheat flour

1 cup oats

1+ teaspoon ground cinnamon

1+ teaspoon ground/powdered ginger

The apple filling

Optional: 1 stick (1/2 cup) unsalted butter

1 teaspoon to 1 tablespoon vanilla extract

6 medium-sized Granny Smith apples to 5 pounds, cored and very thinly sliced

1/3 to 1/2 cup dark brown sugar

1+ tsp. cinnamon

1+ teaspoon ground/powdered ginger

1/4 cup spiced rum

1/4 cup brandy

Directions

Preheat oven to 350 degrees F. Grease a 9×13 pan.

Peel the apples if desired. Cut the apples into very thin slices.

Melt the butter for the streudel topping. In a medium-large bowl, mix the bottom’s melted butter, brown sugar, flour and, if using them, spices. Mix in the oats.

Place the apple slices, the 1/3 to 1/2 cup brown sugar, cinnamon and liquor in a very large bowl and toss to combine.

Take 1/2 cup of the streudel topping and mix it into the apples.

Pour the apples into the greased pan.

Cover the apples with the rest of the streudel mixture and lightly pat down.

Either put the pan on a baking sheet, or put it directly in the oven, and bake for 50 minutes to 60 minutes (an hour).

(Recipe adapted from the Ambitious Kitchen, “The best apple crisp you’ll ever have.”)

boozy-apple-crisp-1-of-8-900x600

This spiced apple crisp, baked with booze, gets better after the first couple of days. Serve warm or hot.


See, use, whatever you want, because all the photos are here on Flickr.