Find the stand-alone recipe here.

Sometimes, great things come from the lowly grill at your local gas station.

That is the case with the corned beef hash burrito, originally hailing from the Triple S gas station in Española.

Uniquely New Mexican and a delicious fusion, there is nothing quite like it.

I was first introduced to this fusion by a co-worker who announced to the newsroom that he was going to get one at the gas station.

Soon, I went to discover this invention myself. I can vouch: it’s amazing.

Here in New Mexico, you will always be asked if you want red, green, or nothing. This refers to green chile and red chile. If you want both, it’s called Christmas.

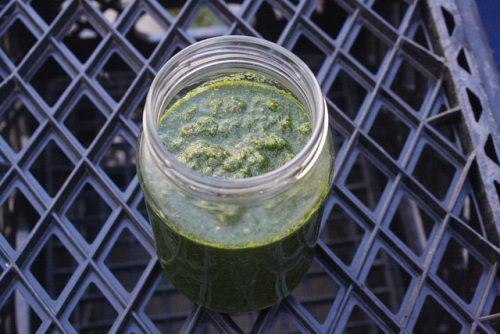
This version leaves the chile choices up to you. I decided to chop up and lightly cook a green chile for the burrito. Normally I would have paired it with salsa and the secret sauce I use for grilled corn and fish tacos, but I was out of both.

There are quite a few moving parts to this recipe.

First, the corned beef hash. I used the canned kind because I haven’t made corned beef in a while. If I had, the hash is pretty easy to make. Finely dice everything (cabbage, potatoes, corned beef) and throw it in the skillet to fry up.

Either way, it fries in the skillet.

Next are the diced potatoes, which are optional.

Since I now have an InstantPot, the brand name for a type of electric pressure cooker, I cooked the potatoes the night before. First, I cooked them for five minutes, which left them a little too hard. I cooked them again for two minutes, which made them a little too soft. The next morning, I diced a few of them, then threw them in a skillet with some oil, salted liberally, and let them fry.

The electric pressure cooker makes steaming/boiling potatoes so much easier than if I had to cook them in a pot on the stove.

Meanwhile, I had a little under a pound of black beans soaking in water since the day before. The morning I wanted to make the corned beef hash, dumped the water the beans had been soaking in, put them in the electric pressure with a bullion cube and let them cook for 15 minutes on high pressure.

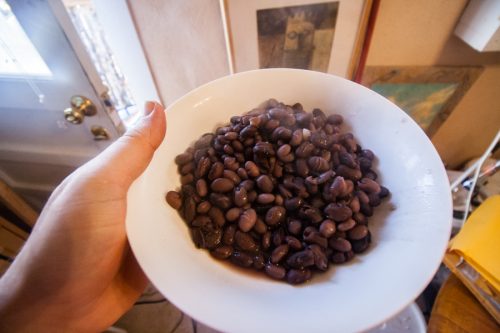
The black beans, after they’ve been cooked in the electric pressure cooker, and before they’re thrown in the skillet to lose any extra liquid.

Lots of people say you can just throw dry beans in the pressure cooker, it just takes more time. I prefer to soak the beans.

You might think this means the beans are done in 15 minutes. It doesn’t. It’s much closer to an hour, between the time it takes to heat the pot and bring it to pressure, as well as the time it takes to naturally release the pressure. Still, an hour without any babysitting the pot isn’t bad.

Potatoes: cooking. Beans: cooking. Corned beef hash: cooking.

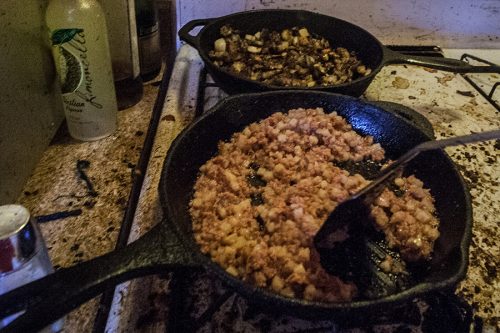
The corned beef hash (front) and potatoes (back).

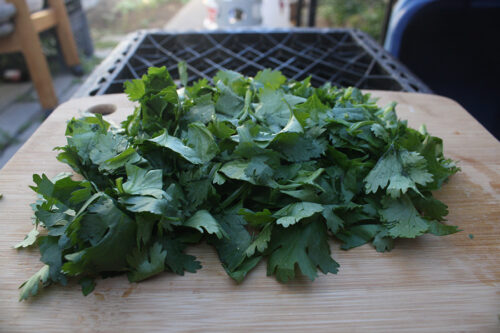
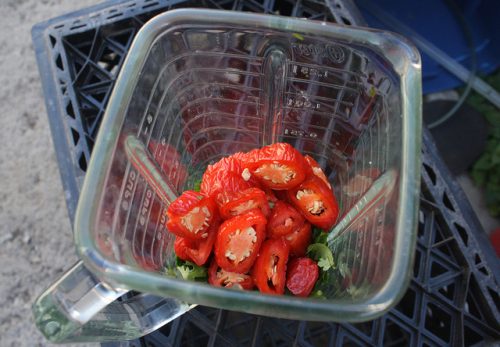
Next up is the green chile. Chop it up and throw it in a hot skillet for a few minutes.

In hindsight, I probably should have added some eggs, either fried and on top of the burrito, and cooked and put inside the burrito, but I didn’t think of it at the time.

When it comes to the burrito, it needs to be large enough to allow for all of the ingredients. Often, packages will state “burrito size.”

So, go make yourself a corned beef hash burrito! You will be amazed at how delicious it is.

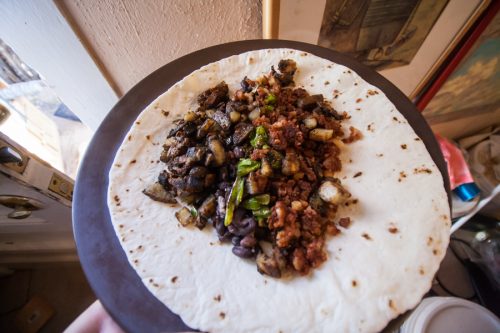
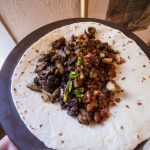
The burrito before rolling. Left to right: Pan-fried potatoes, black beans, green chile, corned beef hash.

Find the rest of the photos here on Flickr.


Corned beef hash breakfast burrito

A staple of New Mexican gas stations, the corned beef breakfast burrito is a wonderful fusion
Prep Time30 minutes
Cook Time30 minutes
Total Time1 hour
Course: Breakfast
Cuisine: American, Fusion, New Mexican
Keyword: burrito
Servings: 2 burritos
Author: Wheeler Cowperthwaite

Ingredients

  • 1-2 eggs scrambled or fried
  • Milk if making scrambled eggs
  • 1-3 green chiles diced
  • 1 can corned beef hash or hash made from slow cooked corned beef
  • 2-4 ounces cooked black beans
  • 3 diced potatoes
  • 2 Burrito-sized tortillas
  • Red chile prepared (optional)
  • secret sauce optional

Instructions

  • Cook the beans, or buy canned beans.
  • Steam or boil potatoes until tender
  • Heat a skillet over medium high heat. Put the hash into the skillet and cook until it begins to lightly brown.
  • Either remove the corned beef hash to container and add the diced potatoes, with some oil, or heat another skillet on high, add a little oil, and toss in the diced potatoes. Shake salt over the potatoes and cook until lightly brown.
  • Cook the eggs and remove to plate or bowl when done.
  • Cook the beans in a skillet with a dab of oil, briefly, to remove excess liquid
  • Briefly heat the first tortilla in the microwave or in the skillet, until just a little warm and pliable.
  • Add the ingredients you’re using to the center of the tortilla, including the hash, potatoes, eggs, beans, chile and anything else, roll, and serve with red chile, salsa, sauce and garnish with lime slices.

In New Mexico, Chile is king. No questions. No debate. Red, or green? Christmas? (Christmas is both red and green.)

(If you want just the recipe, see it here.)

Zhug, after the cilantro and jalapenos and citrus and salt have been blended together. Ready for some fiery consumption.

Cilantro certainly plays a second fiddle, in salsa, as do tomatoes, but still: chile, cilantro, these are the building blocks of many New Mexican meals. So, what does that have to do with zhug? Well, combine those two things into one dish. Blew your mind, didn’t it?

Chile and cilantro are not the sole property of New Mexican cuisine and lots of other cultures do complimentary things with them that I think we should all copy, or at least, pay attention to.

That New Mexico can learn a lot from other parts of the world, including from the middle-east, where zhug originated.

What is zhug, anyway?

It can either be described as a cilantro-based hot sauce (and, depending on how you make it, I mean Hot) or as chile and cilantro pesto. Take your pick. I prefer the former, partially because I make mine scalding.

It’s a very simple sauce. Put cilantro, lemon juice, lime juice and, important here, peppers, into a blender. Blend. Blend, blend, blend.

That’s it. Maybe add some salt, to taste. And you’re done. It’s a pesto-like hot sauce or a hot pesto. Either way, zhug goes well with pita bread and tabbouleh, with some hummus. Maybe you’re going to make zucchini fritters. Add some on the side, along with tzatziki.

I should add, this sauce is very dear to my heart. Being such a fan of cilantro, even naming my blog after a proclivity for it, I gotta say. We all should love zhug.

Zhug

This Yemeni/Somali hot sauce goes great on most things, including rice, fritters and in conjunction with hummus.
Prep Time15 minutes
Cook Time5 minutes
Total Time20 minutes
Course: Side Dish
Cuisine: Somali, Yemeni
Keyword: hot sauce, sauce
Servings: 4 people
Author: Wheeler Cowperthwaite
Cost: $5

Equipment

  • Blender or food processor

Ingredients

  • 10-20 hot peppers (jalapeno) rinsed and chopped (de-seed if heat is an issue)
  • 1-3 bunches of cilantro washed and chopped
  • 3-6 garlic cloves chopped
  • ¼ teaspoon ground cardamom or seeds from 6 cardamom pods crushed
  • ¼ teaspoon ground coriander (cilantro seeds)
  • ½ teaspoon ground cumin
  • 1 tbsp lime juice more to taste
  • ¼ to ½ cup lemon juice more or less to taste
  • 1 tablespoon olive oil
  • Salt to taste
  • 1/4 cup Chopped mint optional

Instructions

  • Chop the cilantro, peppers and garlic.
  • Put all the ingredients, sans salt, in a food processor or blender. Blend until it reaches desired consistency.
  • Add a small amount of salt, to taste.


If you want the full gallery of full-quality photos, they are licensed under a Creative Commons 2.0 Attribution-only license. See them here.


Jalapenos in a blender, before being blended, to make Zhug. Add liquid (lemon/lime juice) to aid in the blending process.

Cilantro, being being chopped up and put in a blender to make Zhug.

So, what’s for dinner?

That’s always a problem, right? Pasta, or . . . What else is in the kitchen? Refrigerator? And the time factor? Do I need to go to the store?

In my house, there are a few things always on hand: vegetables, maybe some meat (leftover, marinated or unprepared), always uncooked rice (and often times, leftover sushi/vinegared rice, plain recipe).

For me, the easiest meal is often times the humble rice bowl. I cook up some rice in my rice cooker, I turn it into sushi/vinegared rice (blog post). Then, do I want to make sushi? Or a rice bowl? Or maybe onigiri? Or maybe, a few sushi rolls now and rice bowls for lunch tomorrow, and some onigiri (rice balls) for later? The options are endless.

Peppers, grilled chicken, cucumbers and seaweed, at the very bottom, sit on top of rice in this rice bowl.

So, what is the rice bowl?

Well, it’s simple. You make some vinegared/sushi rice, put it in a bowl, cut up some veggies into bite-sized pieces, maybe cook up some meat and cut it up too, then throw it all on the rice.

Which veggies? Well, cucumbers are always nice, as are avocadoes. If you thinly slice, then deseed lemons, they are delicious. Being in New Mexico, I always add green chile peppers (unroasted) as well as jalepenos. Nori (seaweed) adds much needed taste. Green onions are also a good addition.

What else do you have? Throw it in there! Leftover steak? Cut it up, throw it in. Same goes for chicken, pork, or other meats.

Add some soy sauce, maybe some spicy/Sriracha mayonnaise, maybe some eel sauce, (Link to Amazon; once I make my own, I will post the recipe and update the link. Your local Asian store should have it for cheap.)

Bam! You’ve got a simple, relatively healthy dinner. Veggies, a little meat. Sure, the rice isn’t particularly healthy, but it’s frugal. Very, very frugal.

Avocados! Taste delicious in rice bowls, as do lemons. Seaweed is also a must.

(I buy sushi rice, Kokuho Rose variety, in 40 pound bags to be as frugal as possible. I store them in five-gallon buckets with lids, a carry over from my days as a homebrewer.)

There you go. Rice bowls. Simple. Delicious. Easy.

Seaweed (nori) is the first thing to go on top of the rice.

See all the photos on Flickr, in high quality.

Realized you don’t know how to make sushi rice? Here’s the recipe.

Want just the rice bowls recipe? Right here.

Simple rice bowls

Makes: as many as you have rice for

Ingredients

Sushi/vinegared rice
1/2 to 1/4 cucumber
1-3 green peppers
1 jalapeno (if you like it spicy)
1 piece of cooked meat (heated up if desired)
1/2 sheet of nori (seaweed sheets)
1 avocado
1 lemon, thinly sliced
All other vegetables, cooked or raw, as you see fit
Other ingredients as you see fit, or have seen in a sushi roll
Condiments such as eel sauce, Sriracha mayonnaise and eel sauce or cream cheese

Directions

1. Cut up the vegetables into bite-sized pieces. Cut the lemon slices into quarters.
2. Put enough rice into the bottom of a bowl.
3. Tear up the nori and place on top of the rice.
4. Put the cut up vegetables and meat, if using, on top of the nori, which is on top of the rice.
5. Heat up in the microwave for 30 second to 1 minute if working with leftovers or desire it hotter
6. Add condiments over the top and enjoy.

This article was originally posted on Oct. 18, 2011 on my homebrew website, Fat Grey Tom’s Cider. It has been re-posted here with the same time stamp.

Our raspberry experiments are proving to be wildly successful. Our first batch of raspberry racked cider, made with a wine yeast none-the-less, is all gone because it just tasted so damn delicious. It also made pretty pictures. We’re working on four gallons, but made with Nottingham Ale Yeast.

Raspberries were boiled (12 oz. of raspberries per 1 gallon) (Trader Joe’s had the best deal at $2.50 per 12 oz. bag) with 1 tablespoon of brown sugar and then put into the racked cider. We then let it sit for about two or three weeks before bottling.


The cider racked on the raspberries, right after they’d been boiled.


Raspberries before the cider has been added.


The raspberry cider after it’d been sitting for weeks.


Isn’t it pretty? It’s been bottled in Newcastle bottles.


The raspberry cider label.

This article was originally posted on Oct. 14, 2011 on my homebrew website, Fat Grey Tom’s Cider. It has been re-posted here with the same time stamp.

October 14 was a cider day.

Leo came over with six gallons of apple juice. We got our measurements ready, realized that we didn’t have the needed two pounds of corn sugar and made up the extra six ounces with brown sugar.

We boiled the brown and corn sugar and added them to the bucket. We poured the apple juice in. Bryce and Leo crossed streams.

The brown sugar colored the water something intense.

We rehydrated the yeast, pitched it, brought the bucket down stairs, cleaned up and called it a day.

The recipe isn’t hard. It’s the same Apfelwein (AW) recipe as it ever was, except this time we’re using the ale yeast again and breaking up the dextrose with brown sugar.

Ingredients:
5 gallons apple juice
2 pounds sugar (26 ounces corn sugar, 6 ounces brown sugar)

Directions:
Boil sugars in water for five minutes.
Put sugar water into fermenter.
Pour apple juice into fermenter.
Pitch yeast.

It’s that easy.

As always, check for the tag “AW Batch #3” (http://brew.wheelerc.org/tag/aw-batch-3/) to see what happens.

It’ll be done and ready for testing a month from Oct. 14, when it was made.

In the mean time, have a home brew! Except none of ours are ready to drink . . . Damn.

This article was originally posted on Oct. 11, 2011 on my homebrew website, Fat Grey Tom’s Cider. It has been re-posted here with the same time stamp.

We did two things on October 14, 2011.

We made a 5-gallon batch of Apfelwein with ale yeast (Nottingham) and we made a 1-gallon batch of Apfelwein with ale yeast in a carboy, exclusively with brown sugar. The 5-gallon batch was mixed with a majority corn sugar and a little brown sugar to finish out the measurements.

Here’s what we did:

5 oz. brown sugar, boiled in 1 cup water for about 5 minutes.

1 gallon Great Value apple juice.

Pour into carboy.

Pitch yeast.

Wait.

As always, check its progress under the tag AW Batch #3C (http://brew.wheelerc.org/tag/aw-batch-3c/)

The brown sugar appears to be giving the AW a darker color than normal.

This article was originally posted on Oct. 3, 2011, on my homebrew website, Fat Grey Tom’s Cider. It has been re-posted here with the same time stamp.

Not to say that we’re totally screwed, but, we may very well be.

You see, it was a long night of brewing, marked by blunders.

It started with a good dinner — vegetarian red curry. It was good.

The Belgian Red — not sure if it will ferment.

We started brewing by boiling 3.5 gallons (we thought it was only 3.) We boiled it all in the huge pot, which turned out to be a good idea.

We put the 3.5 to boil, walked down to the convenience store to buy a package of ice, came back and the water still wasn’t boiling. We waited, it boiled, we added the Amber Malt Extract and Crushed Special B Roast and half the Styrian Goldings Hops.

(Recipe at bottom of the post) 

We boiled it all for an hour, took it off the heat and put it into the fermenting bucket.

And then I realized, the recipe called for adding the other half of the hops at the last ten minutes of the boil.

Woops.

So, I put the other hops in 1 gallon of water and boiled it for ten minutes. The recipe, however, called for the 1 oz of hops to be steeped in the off-heat wort.

Once it was boiling, we put all the ice we had in the house into the wort, which didn’t cool it down much.

And then we added the extra boiling 1 gallon of hops-water.

And were way over five gallons.

So, we took it down stairs to the garage (to get out of the kitchen, so my roomie who lives below could sleep) and put the lid on.

Around midnight, as I was falling asleep, I realized I hadn’t pitched the yeast yet.

I got dressed, tested the temp and found it to be somewhere really hot. Estimated around 90 degrees.

I pitched the yeast and went to bed. “Screw it,” I said to myself.

And so, now, the next day, no bubbles are coming from the brew and the brew store is closed on Mondays.

Damn and blast.

Alas, we have no ready home-brew. We cannot relax and have a home brew. Which is sad.

Next time, we relax.


Recipe:

Belgian Red

Ingredients:
6 lbs.           Amber Malt Extract
1/2 lb.        Crushed Special B Roast
2 oz.            Styrian Goldings Hops
Priming:  
3/4 cup      Corn Sugar

Directions:

Bring water to boil. Add Malt Extract, 1 oz. Hops and Crushed Special B Roast.

Boil for an hour.

Turn off heat, steep the other 1 oz. Hops in wort for ten minutes.

Bring water up to five gallons.

Bring wort temperature down to yeast’s directions. Pitch yeast.

Ferment for one week, about until fermentation is complete.

Bottle, cap, let sit for two weeks.

Drink.

UPDATE, April 6, 2013: The original premise was correct. The beer has, so far, continued to be terrible. A 12-pack is still ageing, but the ageing only seems to mellow it, not make it taste less horrible.