This year has been a banner one for my garden which has been bolstered by all the time I spend at home, by being the one outdoor space I have to use and by all the extra time I can devote to it that normally I would spend commuting every day.

One of the banner crops that really has pushed its way through the garden, going so far as to knock over a corn stalk, is the zucchini.

Plated zucchini fritters

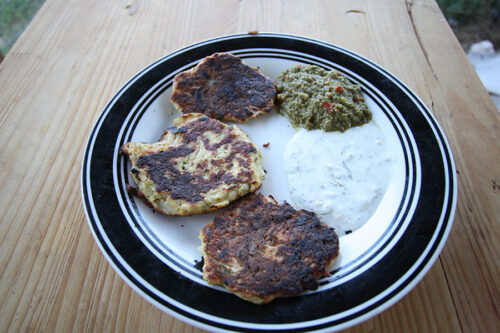
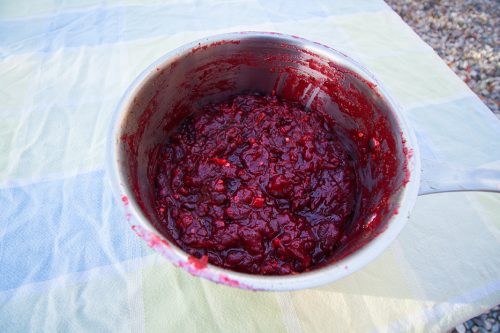
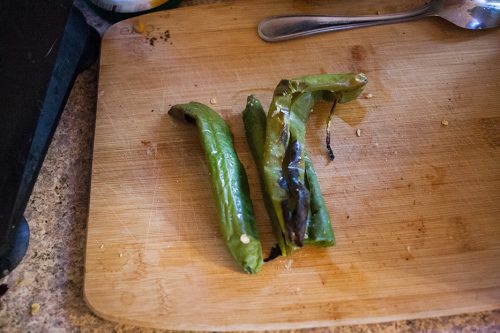
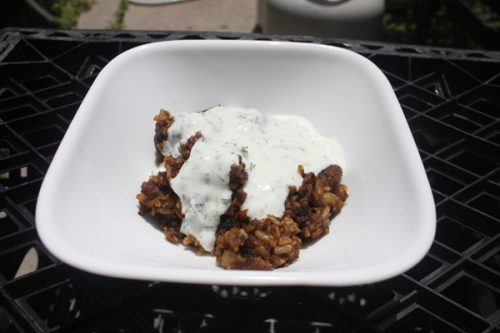
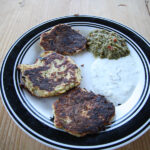
Zucchini fritters are way, other than bread, to easily use up the abundant crop. Here they are served with zhug, a Yemeni cilantro-based hot sauce, and tzatziki, the yogurt-based sauce.

I have so, so many of them and, I have absolutely no doubt that you, or maybe your neighbor, or maybe just the person down the street, is just like me and drowning in a sea of zucchini.

That’s where fritters come in.

Fritter is a broad term for potatoes, zucchini, fruit, meat, dough, and probably many more things, that have been combined and are fried. In this case, the recipe is kind of like latkes (also called potato pancakes), but with zucchini instead.

The comparison is important because both potatoes and zucchini are jam packed with lots and lots of water that need to be removed before they are turned into fritters. It’s the same process that goes into preparing decent hash browns, although usually hand power gets them dry enough for the skillet.

In this recipe, salt will help drain the water out of the shredded zucchini, with the aid of a strainer. That only gets so much water out, so there is a second step. Either the shreds can be wrung by hand or, they can be balled up into a dish towel and wrung out as the towel is twisted. I find the dish towel applies enough force to get most of the water out.

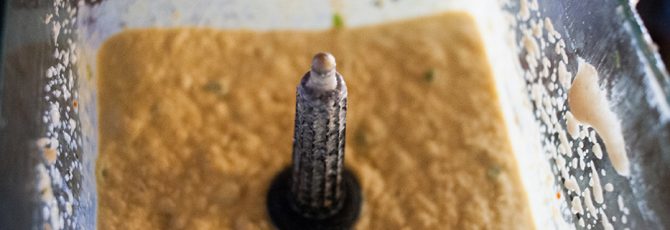
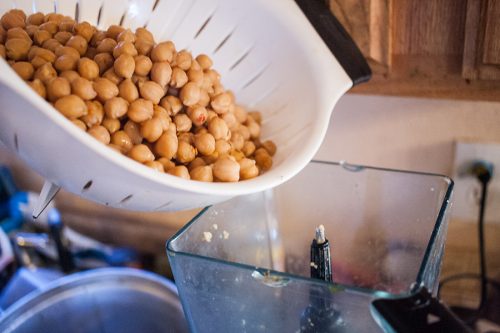
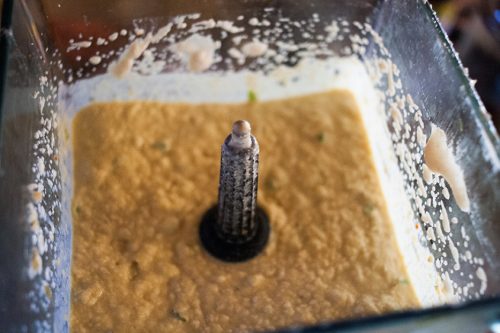
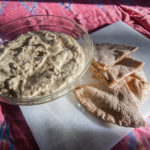
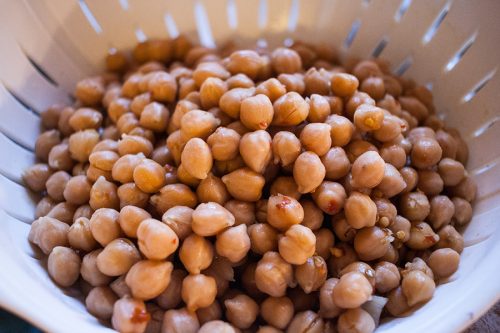
The other reason I chose to write about fritters is they go great with two other recipes I’ve already shared in previous columns, mainly, tzatzikizhug and hummus. All three make great dips for fritters.


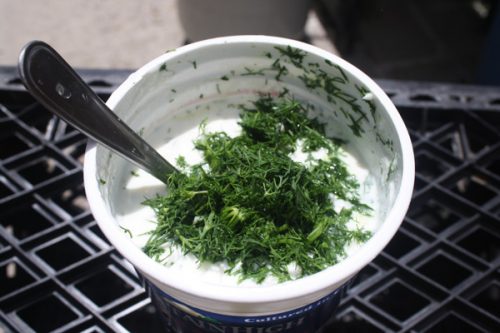
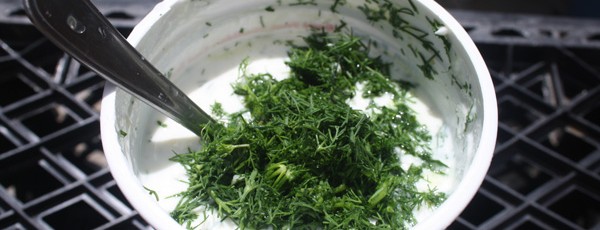
Dill piles up in a container of yogurt being used to mix the Tzatziki.

Dill plays a starring role in tzatziki and it goes great in the fritters as well.  Most herbs would do well as a seasoning but, since I like to pair them with tzatziki, I always reach for dill first. It does not hurt that the dill has also been having a banner year, since it has not, yet, been pushed over or smothered by the zucchini.

One thing that most fritters need is some kind of binder. Here, I use eggs and crumbled feta, as well as a little bit of flour.

When it comes to the frying, use a lot of oil if you really want to go for that deep-fried taste, or use a lot less if you’re using a non-stick pan. I personally use cast iron skillets so a little oil often goes a long way. Alternatively, the fritters could be baked in the oven.


Zucchini Fritters

These zucchini fritters are a great way to use up a bumper crop and go great with tzatziki, zhug and hummus.
Prep Time1 hour
Cook Time30 minutes
Total Time1 hour 30 minutes
Course: Appetizer
Cuisine: Mediterranean
Keyword: fritters, zucchini
Servings: 12 fritters
Author: Wheeler Cowperthwaite

Ingredients

  • 2 lbs zucchini
  • 1 1/2 tsp salt
  • 2 eggs beaten
  • 1/2 to 1 medium onion
  • 4 tbsp minced fresh dill
  • 1/2 cup Feta cheese
  • 2 garlic cloves finely minced
  • 1/4 tsp pepper
  • 1/3 cup flour
  • 1 tsp baking powder
  • oil as needed for pan frying

Instructions

  • Shred the zucchini through the large holes of a grater. Transfer to a strainer on top of a bowl and toss with the salt and let sit for 10-30 minutes.
  • Wring out the zucchini shreds, either by hand or by putting handfuls into the center of a clean dishtowel and twisting the towel. Try to get out as much water as possible.
  • Finely mince the onion or shred it with the grater. Mince the fresh dill and the garlic.
  • Beat the eggs in a large bowl.
  • Heat a large skillet on medium heat and add a little bit of oil.
  • Mix in the zucchini, the feta cheese, the onions or scallions, the dill, the garlic and the pepper. Mix.
  • Sprinkle and mix in the baking powder and flour until well combined.
  • Drop large spoonfuls of the batter onto the skillet, but do not crowd them together. Lightly press down on the fritters with the back of a spoon.
  • Turn when golden brown, about three minutes. After the other side is golden brown, remove to a plate and serve with tzatziki and hummus.

Summertime, and the living is hot, which means cooking indoors is a pain. There is a solution. The grill.

I love grills for a multitudes of reasons. They can be quick, they are outdoors, they are tasty and easy and, in the summer, cooking inside is far too miserable.

That’s where a new take on grilled chicken comes in. Specifically, it is a Thai take on the humble hunk of chicken meat.

Gai yang, also called kai yang or ping gai, or simply Thai grilled chicken, brings together some of the most prominent flavors in the west: lime, cilantro, garlic and chiles.

Thai grilled chicken, or Gai Yang, with steamed rice and a grilled green chile.

The flavors mix, meld and create something worth adding to the regular stable of meat marinades.

I was lucky enough to, most recently, take a return trip to Thailand just on the cusp of the current pandemic. That meant tourism was down and the streets were not nearly as packed as I have seen them in travels past. Although there were fewer people, there were still plenty of street food vendors with small grills and bags of marinating meat.

Many of the grilled foods had two common ingredients: lime and chiles. There is a third ingredient, which smells awful, but really adds a savory, or unami taste: fish sauce. I swear by it in most marinades, where it adds a saltiness and depth of flavor not offered by soy sauce.

It’s an ingredient that is in lots of Thai cuisine but its influence melds into the background, becoming indistinguishable on the palate, except for a sparkle.

Really, gai yang is not that different from a regular citrus marinade, with the exception of fish sauce: cilantro, garlic, lemon and lime.

The original marinade recipe I used as a base calls for chopped lemongrass and cilantro roots. I know finding cilantro with the root still on his hit or miss, and lemongrass is hard to find, so I’ve substituted lemon rind.

Making the marinade requires a good processor or blender and the chicken should sit for at least three hours, if not overnight.

I serve this chicken with some green chiles roasted on the grill and rice.

Wheeler’s Thai grilled chicken

This Thai grilled chicken, or Gai Yang, with a side of roasted chiles and rice, makes a great weekday staple.
Prep Time45 minutes
Cook Time15 minutes
Total Time1 hour
Course: Main Course
Cuisine: Thai
Keyword: grilled chicken, Thai
Author: Wheeler Cowperthwaite

Ingredients

Main

  • 1-4 lbs chicken breasts, thighs or drumsticks
  • 2+ green chiles
  • 1 cup cilantro, coarsely chopped

Marinade

  • 3 tbsp chopped garlic
  • 2 jalapeños, chopped
  • 1 tbsp brown sugar
  • 3 tbsp fish sauce
  • 2+ tbsp lime juice
  • 2 tbsp white or red wine (optional)
  • 1 tsp sesame seed oil (optional)
  • 2 tsp soy sauce
  • 15 sprigs cilantro, coarsely chopped
  • 1/2 lemon, deseeded, coarsely chopped

Sauce

  • 2 dried red chiles, soaked, then coarsely chopped
  • 2 cloves garlic, coarsely chopped
  • 1 tbsp brown sugar
  • 1/4 tsp salt
  • 1/2 cup rice vinegar

Instructions

Marinade and sauce

  • At least three hours prior to grilling the chicken, prepare and marinade the chicken.
  • In a blender or food processor, combine the marinade ingredients. Blend for 2-3 minutes, until everything is well combined. Everything should already be chopped.
  • Combine the chicken and the marinade in a container, bowl or ziplock bag and refrigerate for at least three hours. Overnight is preferable.
  • While the chicken is marinating, combine all of the sauce ingredients in the food processor or blender and mix until well combined. Remove to a separate container for serving and refrigerate until ready to serve.

Grill

  • Grill the chicken over medium to medium-high heat until done. Chicken thighs taken longer than breasts and bone in takes longer than boneless. If the chicken is bone-in, cook over medium heat. Add a little of the marinade to the chicken while it cooks.
  • While the chicken is grilling add the green chiles, cut lengthwise, to the grill and cook until the skin is well blistered.
  • Once the chicken is done, remove from the grill and allow to rest for 2-3 minutes.
  • Serve with rice and the sauce you previously made in the blender/food processor and the roasted chiles.
  • Garnish the plates with the chopped cilantro.

Notes

Serve with hot rice.
Barbecue chicken sauce recipe from Practical Thai Cooking by Puangkram Schmitz and Michael Worman.

Cranberry sauce (or relish) is usually a dish reserved for Thanksgiving, Christmas and any other time you’re serving a turkey.

Whatever the occasion, cranberry sauce is one of the dishes you should make before before roasting the turkey, along with stuffing and most of the gravy.

Now, before you entirely discount this recipe, I can attest that it was one of the biggest hits from Thanksgiving 2017. The fact that spice is a part of what would normally be a sweet dish adds some to the allure.

It’s also very easy, although how cheap depends on if you can get cranberries on sale.

It’s mostly about the taste, but somewhat about the presentation.

It’s essentially your regular cranberry sauce recipe (which will gel in the refrigerator) with the addition of lemon and lime juice, a little ginger and some jalapeños.

(more…)

Whenever someone asks, “What’s a healthy recipe that’s easy and I can snack on?” I have a stock reply.

Hummus. (See just the recipe here).

It’s easy, it’s healthy, it’s delicious and it can go with vegetables, bread, with other sauces, or be served as a spread.

So, what is hummus and why should you make it at home?

Hummus is a mix of cooked and crushed chickpeas, also called garbanzo beans, with tahini, also known as sesame seed paste.

There are some other ingredients: lemon juice and salt, as well as a host of optional ingredients including garlic, peppers, artichoke hearts and other seasonings.

Mainly though, it’s just cooked chickpeas and tahini, blended together.

Things can get a little bit more complicated if you’re willing to take the extra step (frugal and healthy) of cooking the chickpeas yourself.

Even then, hummus is a super simple recipe.

It’s also cheap.

Adding the chickpeas to the blender.

Normally, stores sell 8-16 ounces of hummus for $3 to $8.

You need eight ounces of tahini for this recipe which sells for $3. The pound of dried chickpeas is another dollar.

It makes a full 72-ounce blender full, which is a decent return on investment.

Most of the time, I do not eat it fast enough and it begins to ferment. Not go bad, per se, but you can tell it’s fermenting after 10 days or so, despite all the lemon and lime juice in it.

This is also a great recipe if you want to take the first step toward cooking your own beans, instead of buying them in the can.

It’s forgiving, it’s delicious and no one will know they’re eating beans.

I’ve included instructions for both electric pressure cooker users (such as the InstantPot) as well as those using a slow cooker.

The finished green chili hummus, after everything has been blended.

You could also cook the beans on the stove, but I prefer one of the two plug in methods.

Because hummus is so simple, and its basic ingredients are so few, it is a type of blank slate dish that can take on any number of additional flavors.

My favorites are roasted green chiles (a New Mexico favorite) and marinated artichoke hearts. Take a look at the commercial hummus being sold in your local store: there’s pimento hummus, there’s hummus with dill, there’s hummus with ingredients it shouldn’t be paired with.


Goes-with-everything hummus

This hummus can be jazzed up with most anything and goes great as a side and as a dip.
Course: Side Dish
Cuisine: Mediterranean
Keyword: dip, sauce
Servings: 72 ounces
Author: Wheeler Cowperthwaite
Cost: $5

Equipment

  • Blender

Ingredients

  • 1 pound dry chickpeas or 7 cups cooked/canned chickpeas also called garbanzo beans
  • 8 ounces tahini
  • 2 tablespoons lime juice
  • 2 tablespoons olive oil
  • 3 tablespoons chopped garlic more to taste
  • Salt to taste
  • 1/3 cup reserved chickpea cooking water
  • Artichoke hearts (optional)
  • Chopped green chile, roasted or unroasted (optional)
  • Chopped peppers (optional)

Instructions

  • Soak the chickpeas overnight in cold water at a rate of three times the quantity of water to chickpeas.
  • If cooking the chickpeas in a slow cooker, cook on low for 5 to 8 hours. Make sure the chickpeas are covered with water.
  • If cooking the chickpeas in an electric pressure cooker, cover with 3-4 inches of water and set for 15-20 minutes, or 20-25 minutes on beans.
  • Drain the chickpeas, reserving 1⁄3 cup of the cooking water.
  • Add 2⁄3 of the chickpeas (or all, to make a creamier hummus) into a blender or food processor, along with the lemon juice. When blending, a little more liquid can help facilitate the process. Add a few tablespoons of cooking water as needed.
  • Add the tahini and continue blend until everything is mixed. Once the chickpeas blend with the tahini, the color should change to a lighter shade of yellow.
  • Decant the mixture into a mixing bowl and add into the blender the garlic, the lime juice, the olive oil and, if using, the artichoke hearts or other ingredients and blend. Add the new mixture into the mixing bowl and stir until well combined.
  • Add salt, or garlic salt, to taste. Start with two teaspoons. Just enough salt will make the flavors of the hummus pop.
  • Add the rest of the chickpeas, either only briefly blended or whole, depending on texture desires.
  • Refrigerate or enjoy immediately, The hummus will get just a little bit better and thicken after it has been refrigerated.


See just the recipe here.

See the full album of photos on Flickr.


The cooked chickpeas (garbanzo beans) after they have been strained. The flecks of red are from red chiles they cooked with.


Lemon juice helps the blending process and adds a necessary acidity.


I add garlic (chopped) to the blender before adding the garbanzo beans.


Roasted green chiles, before they are diced and thrown into the blender. They were roasted on the barbecue.


You can get the perishable Trader Joe’s tahini sauce ($2.99 per 8 oz container) or get a larger container at an Asian market.


The tahini (sesame seed paste) is added on top of the chickpeas, in the blender.


The finished green chili hummus, after everything has been blended.

Tzatziki, a yogurt sauce made with lemon juice, dill, and a few other ingredients, is a fantastic side to a variety of dishes, including zucchini fritters, curry fried rice and hummus, especially when paired with pita bread.

(Skip to just the recipe)

It also goes very well as a compliment to zhug (a hot sauce made of cilantro, peppers and lemon/lime juice) creating what for me is the ultimate quadfecta in pita and falafel sides: zhug, Tzatzikihummus and tabbouleh.

Tzatziki poured over curry fried rice makes an easy and delicious meal. All this is missing is some zhug.

There are a couple of things to consider when making tzatziki, aside from how to spell it.

The first is what kind of yogurt to use. I use full-fat plain yogurt or, if I’m going through a DIY phase, I use yogurt I’ve made from whole milk.

Plain full-fat yogurt is superior (in my opinion) to the more popular and prevalent fat-free and 99 percent fat free options because it has less sugar.

Yogurt makers add sugar to make up for the taste of the lost fat. Naturally occurring fat is a lot more healthy than artificially added sugar. Less sugar, less problems.

Dill piles up in a container of yogurt being used to mix the tzatziki.

Second,  good dill, which can be surprisingly hard to find. When I find it, I buy a large bunch. You can also add some chopped mint to the batch, if you’re feeling a little adventerous or have mint on hand. If I have it, I add it. If I don’t have any available, then it doesn’t go in.

Tzatziki is more like art than science. The amount of lemon juice used, of dill, of lime juice, of salt, of garlic, everything is up for interpretation.

For just the recipe, see the page here.

Wheeler's Dill-icious tzatziki

This yogurt staple is heavy on the dill, lemon, and lime and offsets the saltiness in many foods.
Prep Time30 minutes
Total Time30 minutes
Course: Side Dish
Cuisine: Mediterranean
Servings: 2 cups
Author: Wheeler Cowperthwaite

Ingredients

  • 2 cups plain yogurt
  • 2+ tbsp finely chopped fresh dill more as desired/to taste
  • 2+ tbsp lemon juice more to taste
  • 1-2 tbsp lime juice
  • 2 cloves garlic, finely minced
  • 1 pinch black pepper
  • salt to taste
  • 1 tbsp fresh mint, finely chopped (optional)

Instructions

  • If thicker tzatziki is desired, either buy “Greek” yogurt or strain regular yogurt by placing a cheesecloth in a strainer, and the strainer in a bowl, and pouring the unstrained yogurt into the cheesecloth lining. Cover and let sit in the refrigerator overnight or for 8 hours.
  • Chop garlic, dill and, it if is being used, mint.
  • Mix yogurt in a medium bowl with all of the ingredients except for salt, until will combined.
  • Salt to taste immediately and use or refrigerate for 8+ hours and then salt to taste.