Cranberry sauce (or relish) is usually a dish reserved for Thanksgiving, Christmas and any other time you’re serving a turkey.

Whatever the occasion, cranberry sauce is one of the dishes you should make before before roasting the turkey, along with stuffing and most of the gravy.

Now, before you entirely discount this recipe, I can attest that it was one of the biggest hits from Thanksgiving 2017. The fact that spice is a part of what would normally be a sweet dish adds some to the allure.

It’s also very easy, although how cheap depends on if you can get cranberries on sale.

It’s mostly about the taste, but somewhat about the presentation.

It’s essentially your regular cranberry sauce recipe (which will gel in the refrigerator) with the addition of lemon and lime juice, a little ginger and some jalapeños.

(more…)

Whenever someone asks, “What’s a healthy recipe that’s easy and I can snack on?” I have a stock reply.

Hummus. (See just the recipe here).

It’s easy, it’s healthy, it’s delicious and it can go with vegetables, bread, with other sauces, or be served as a spread.

So, what is hummus and why should you make it at home?

Hummus is a mix of cooked and crushed chickpeas, also called garbanzo beans, with tahini, also known as sesame seed paste.

There are some other ingredients: lemon juice and salt, as well as a host of optional ingredients including garlic, peppers, artichoke hearts and other seasonings.

Mainly though, it’s just cooked chickpeas and tahini, blended together.

Things can get a little bit more complicated if you’re willing to take the extra step (frugal and healthy) of cooking the chickpeas yourself.

Even then, hummus is a super simple recipe.

It’s also cheap.

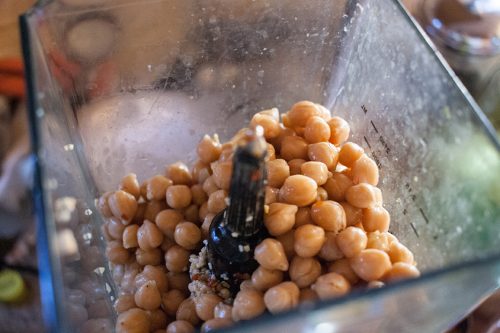
Adding the chickpeas to the blender.

Normally, stores sell 8-16 ounces of hummus for $3 to $8.

You need eight ounces of tahini for this recipe which sells for $3. The pound of dried chickpeas is another dollar.

It makes a full 72-ounce blender full, which is a decent return on investment.

Most of the time, I do not eat it fast enough and it begins to ferment. Not go bad, per se, but you can tell it’s fermenting after 10 days or so, despite all the lemon and lime juice in it.

This is also a great recipe if you want to take the first step toward cooking your own beans, instead of buying them in the can.

It’s forgiving, it’s delicious and no one will know they’re eating beans.

I’ve included instructions for both electric pressure cooker users (such as the InstantPot) as well as those using a slow cooker.

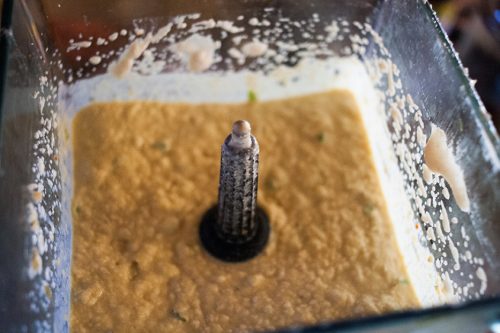
The finished green chili hummus, after everything has been blended.

You could also cook the beans on the stove, but I prefer one of the two plug in methods.

Because hummus is so simple, and its basic ingredients are so few, it is a type of blank slate dish that can take on any number of additional flavors.

My favorites are roasted green chiles (a New Mexico favorite) and marinated artichoke hearts. Take a look at the commercial hummus being sold in your local store: there’s pimento hummus, there’s hummus with dill, there’s hummus with ingredients it shouldn’t be paired with.


Goes-with-everything hummus

This hummus can be jazzed up with most anything and goes great as a side and as a dip.
Course: Side Dish
Cuisine: Mediterranean
Keyword: dip, sauce
Servings: 72 ounces
Author: Wheeler Cowperthwaite
Cost: $5

Equipment

  • Blender

Ingredients

  • 1 pound dry chickpeas or 7 cups cooked/canned chickpeas also called garbanzo beans
  • 8 ounces tahini
  • 2 tablespoons lime juice
  • 2 tablespoons olive oil
  • 3 tablespoons chopped garlic more to taste
  • Salt to taste
  • 1/3 cup reserved chickpea cooking water
  • Artichoke hearts (optional)
  • Chopped green chile, roasted or unroasted (optional)
  • Chopped peppers (optional)

Instructions

  • Soak the chickpeas overnight in cold water at a rate of three times the quantity of water to chickpeas.
  • If cooking the chickpeas in a slow cooker, cook on low for 5 to 8 hours. Make sure the chickpeas are covered with water.
  • If cooking the chickpeas in an electric pressure cooker, cover with 3-4 inches of water and set for 15-20 minutes, or 20-25 minutes on beans.
  • Drain the chickpeas, reserving 1⁄3 cup of the cooking water.
  • Add 2⁄3 of the chickpeas (or all, to make a creamier hummus) into a blender or food processor, along with the lemon juice. When blending, a little more liquid can help facilitate the process. Add a few tablespoons of cooking water as needed.
  • Add the tahini and continue blend until everything is mixed. Once the chickpeas blend with the tahini, the color should change to a lighter shade of yellow.
  • Decant the mixture into a mixing bowl and add into the blender the garlic, the lime juice, the olive oil and, if using, the artichoke hearts or other ingredients and blend. Add the new mixture into the mixing bowl and stir until well combined.
  • Add salt, or garlic salt, to taste. Start with two teaspoons. Just enough salt will make the flavors of the hummus pop.
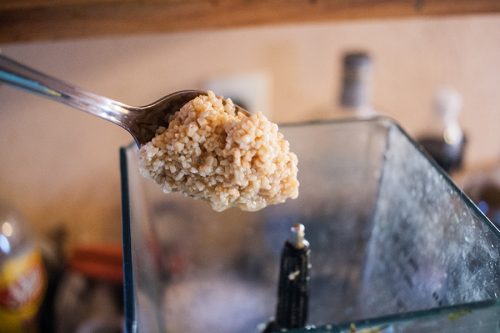
  • Add the rest of the chickpeas, either only briefly blended or whole, depending on texture desires.
  • Refrigerate or enjoy immediately, The hummus will get just a little bit better and thicken after it has been refrigerated.


See just the recipe here.

See the full album of photos on Flickr.


The cooked chickpeas (garbanzo beans) after they have been strained. The flecks of red are from red chiles they cooked with.


Lemon juice helps the blending process and adds a necessary acidity.


I add garlic (chopped) to the blender before adding the garbanzo beans.


Roasted green chiles, before they are diced and thrown into the blender. They were roasted on the barbecue.


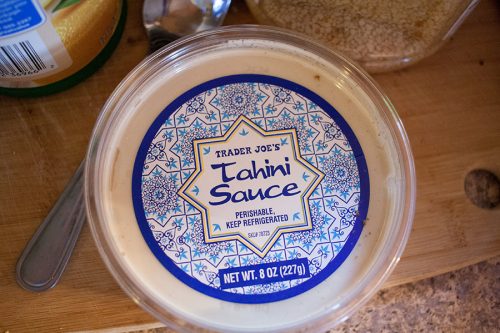
You can get the perishable Trader Joe’s tahini sauce ($2.99 per 8 oz container) or get a larger container at an Asian market.


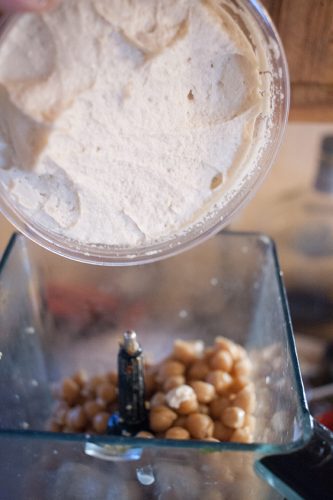
The tahini (sesame seed paste) is added on top of the chickpeas, in the blender.


The finished green chili hummus, after everything has been blended.

Find the stand-alone recipe here.

Sometimes, great things come from the lowly grill at your local gas station.

That is the case with the corned beef hash burrito, originally hailing from the Triple S gas station in Española.

Uniquely New Mexican and a delicious fusion, there is nothing quite like it.

I was first introduced to this fusion by a co-worker who announced to the newsroom that he was going to get one at the gas station.

Soon, I went to discover this invention myself. I can vouch: it’s amazing.

Here in New Mexico, you will always be asked if you want red, green, or nothing. This refers to green chile and red chile. If you want both, it’s called Christmas.

This version leaves the chile choices up to you. I decided to chop up and lightly cook a green chile for the burrito. Normally I would have paired it with salsa and the secret sauce I use for grilled corn and fish tacos, but I was out of both.

There are quite a few moving parts to this recipe.

First, the corned beef hash. I used the canned kind because I haven’t made corned beef in a while. If I had, the hash is pretty easy to make. Finely dice everything (cabbage, potatoes, corned beef) and throw it in the skillet to fry up.

Either way, it fries in the skillet.

Next are the diced potatoes, which are optional.

Since I now have an InstantPot, the brand name for a type of electric pressure cooker, I cooked the potatoes the night before. First, I cooked them for five minutes, which left them a little too hard. I cooked them again for two minutes, which made them a little too soft. The next morning, I diced a few of them, then threw them in a skillet with some oil, salted liberally, and let them fry.

The electric pressure cooker makes steaming/boiling potatoes so much easier than if I had to cook them in a pot on the stove.

Meanwhile, I had a little under a pound of black beans soaking in water since the day before. The morning I wanted to make the corned beef hash, dumped the water the beans had been soaking in, put them in the electric pressure with a bullion cube and let them cook for 15 minutes on high pressure.
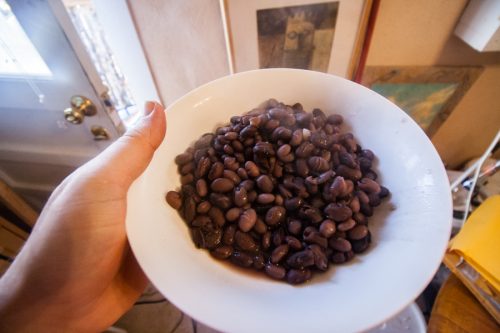
The black beans, after they’ve been cooked in the electric pressure cooker, and before they’re thrown in the skillet to lose any extra liquid.

Lots of people say you can just throw dry beans in the pressure cooker, it just takes more time. I prefer to soak the beans.

You might think this means the beans are done in 15 minutes. It doesn’t. It’s much closer to an hour, between the time it takes to heat the pot and bring it to pressure, as well as the time it takes to naturally release the pressure. Still, an hour without any babysitting the pot isn’t bad.

Potatoes: cooking. Beans: cooking. Corned beef hash: cooking.
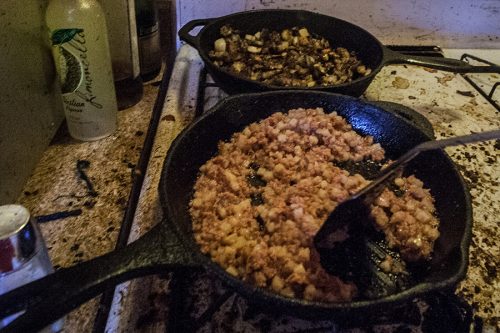
The corned beef hash (front) and potatoes (back).

Next up is the green chile. Chop it up and throw it in a hot skillet for a few minutes.

In hindsight, I probably should have added some eggs, either fried and on top of the burrito, and cooked and put inside the burrito, but I didn’t think of it at the time.

When it comes to the burrito, it needs to be large enough to allow for all of the ingredients. Often, packages will state “burrito size.”

So, go make yourself a corned beef hash burrito! You will be amazed at how delicious it is.

The burrito before rolling. Left to right: Pan-fried potatoes, black beans, green chile, corned beef hash.

Find the rest of the photos here on Flickr.


Corned beef hash breakfast burrito

A staple of New Mexican gas stations, the corned beef breakfast burrito is a wonderful fusion
Prep Time30 minutes
Cook Time30 minutes
Total Time1 hour
Course: Breakfast
Cuisine: American, Fusion, New Mexican
Keyword: burrito
Servings: 2 burritos
Author: Wheeler Cowperthwaite

Ingredients

  • 1-2 eggs scrambled or fried
  • Milk if making scrambled eggs
  • 1-3 green chiles diced
  • 1 can corned beef hash or hash made from slow cooked corned beef
  • 2-4 ounces cooked black beans
  • 3 diced potatoes
  • 2 Burrito-sized tortillas
  • Red chile prepared (optional)
  • secret sauce optional

Instructions

  • Cook the beans, or buy canned beans.
  • Steam or boil potatoes until tender
  • Heat a skillet over medium high heat. Put the hash into the skillet and cook until it begins to lightly brown.
  • Either remove the corned beef hash to container and add the diced potatoes, with some oil, or heat another skillet on high, add a little oil, and toss in the diced potatoes. Shake salt over the potatoes and cook until lightly brown.
  • Cook the eggs and remove to plate or bowl when done.
  • Cook the beans in a skillet with a dab of oil, briefly, to remove excess liquid
  • Briefly heat the first tortilla in the microwave or in the skillet, until just a little warm and pliable.
  • Add the ingredients you’re using to the center of the tortilla, including the hash, potatoes, eggs, beans, chile and anything else, roll, and serve with red chile, salsa, sauce and garnish with lime slices.
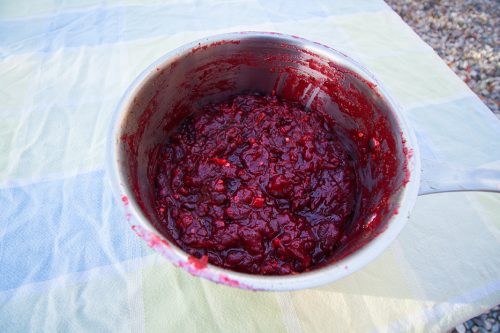
In New Mexico, Chile is king. No questions. No debate. Red, or green? Christmas? (Christmas is both red and green.)

(If you want just the recipe, see it here.)

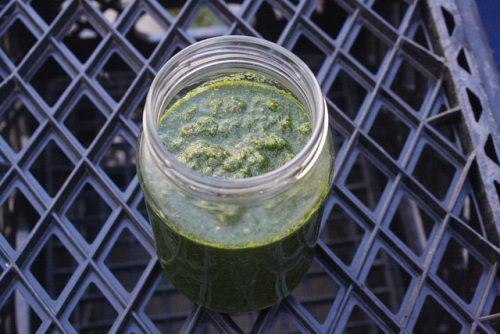
Zhug, after the cilantro and jalapenos and citrus and salt have been blended together. Ready for some fiery consumption.

Cilantro certainly plays a second fiddle, in salsa, as do tomatoes, but still: chile, cilantro, these are the building blocks of many New Mexican meals. So, what does that have to do with zhug? Well, combine those two things into one dish. Blew your mind, didn’t it?

Chile and cilantro are not the sole property of New Mexican cuisine and lots of other cultures do complimentary things with them that I think we should all copy, or at least, pay attention to.

That New Mexico can learn a lot from other parts of the world, including from the middle-east, where zhug originated.

What is zhug, anyway?

It can either be described as a cilantro-based hot sauce (and, depending on how you make it, I mean Hot) or as chile and cilantro pesto. Take your pick. I prefer the former, partially because I make mine scalding.

It’s a very simple sauce. Put cilantro, lemon juice, lime juice and, important here, peppers, into a blender. Blend. Blend, blend, blend.

That’s it. Maybe add some salt, to taste. And you’re done. It’s a pesto-like hot sauce or a hot pesto. Either way, zhug goes well with pita bread and tabbouleh, with some hummus. Maybe you’re going to make zucchini fritters. Add some on the side, along with tzatziki.

I should add, this sauce is very dear to my heart. Being such a fan of cilantro, even naming my blog after a proclivity for it, I gotta say. We all should love zhug.

Zhug

This Yemeni/Somali hot sauce goes great on most things, including rice, fritters and in conjunction with hummus.
Prep Time15 minutes
Cook Time5 minutes
Total Time20 minutes
Course: Side Dish
Cuisine: Somali, Yemeni
Keyword: hot sauce, sauce
Servings: 4 people
Author: Wheeler Cowperthwaite
Cost: $5

Equipment

  • Blender or food processor

Ingredients

  • 10-20 hot peppers (jalapeno) rinsed and chopped (de-seed if heat is an issue)
  • 1-3 bunches of cilantro washed and chopped
  • 3-6 garlic cloves chopped
  • ¼ teaspoon ground cardamom or seeds from 6 cardamom pods crushed
  • ¼ teaspoon ground coriander (cilantro seeds)
  • ½ teaspoon ground cumin
  • 1 tbsp lime juice more to taste
  • ¼ to ½ cup lemon juice more or less to taste
  • 1 tablespoon olive oil
  • Salt to taste
  • 1/4 cup Chopped mint optional

Instructions

  • Chop the cilantro, peppers and garlic.
  • Put all the ingredients, sans salt, in a food processor or blender. Blend until it reaches desired consistency.
  • Add a small amount of salt, to taste.


If you want the full gallery of full-quality photos, they are licensed under a Creative Commons 2.0 Attribution-only license. See them here.


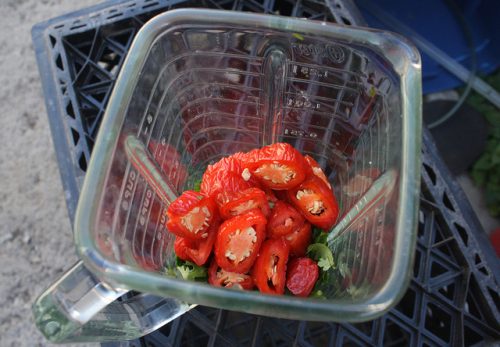
Jalapenos in a blender, before being blended, to make Zhug. Add liquid (lemon/lime juice) to aid in the blending process.

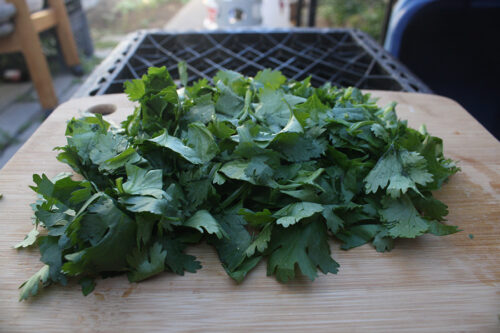
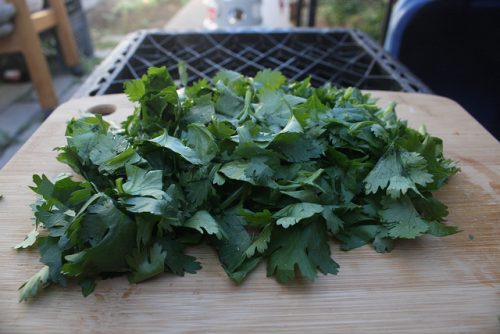
Cilantro, being being chopped up and put in a blender to make Zhug.

I’ve been a fan of curry pastes for a long time, as well as a fan of buying ingredients in bulk for cost savings.

I don’t just buy curry pastes in bulk. Potatoes, too, as well as chicken thighs when there’s a big sale.

Somehow, and I don’t know how, I alighted on the idea to combine all three of these things. It may have started with pan-fried potatoes, or maybe with oven baked chicken thighs (skin on, bone in). It may have its genesis in yellow curry fried rice, where I first learned that the (Thai) curry paste works incredibly well as a seasoning.

Before I go any further, I need to mention that this dish goes really well with at least tzatziki, and probably zhug as well.

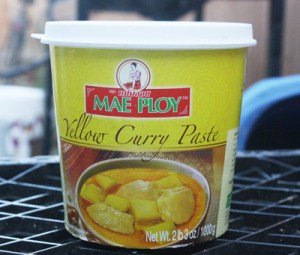
Yellow curry paste!

Irregardless of how it happened, I then used yellow curry paste (the mildest of the pastes) as a seasoning for pan fried potatoes. All of this is being done in a cast-iron skillet, of course.

Finally, I decided that the best of all worlds is to put the chicken thighs on top of the potatoes, and maybe a few other vegetables and then bake to allow the juices and fat to seep into the potatoes, mingling the flavors.

The problem with chicken thighs is they take a long time to cook at a high temperature. It’s not so much a problem as something you need to be aware of going into the cooking process.

(Continued after the jump)

(more…)

Having made rice bowls the night before, I had lots of leftover rice. (Part and parcel of making rice bowls is leftover rice, to either be used in future bowls or in other dishes).

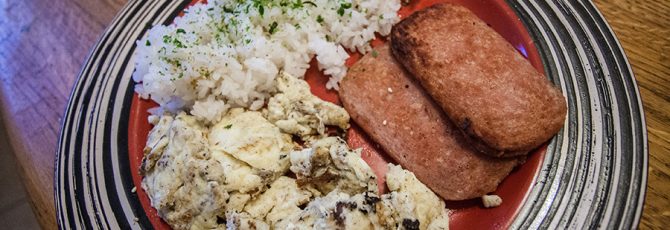
Finished spam, rice and (scrambled) eggs. Furikake is on the top of the sushi, or vinegared, rice.

That meant, this morning, it was time to fry up some spam, cook some eggs in the spam fat and heat up that leftover rice to make a (modern) Hawaiian classic, spam, eggs and rice.

Now, a close relative of this is the spam musubi. I wrote about it for the Rio Grande SUN (no link since the columns don’t make it to the website) but I did post the recipe here.

Many people, including the people I work with, cast aspersions on the very idea of spam, or scoff, or express their pure disgust at the idea. Then again, lots of people are scared of lots of things, and if you weren’t put off by the article title, I hope you will keep reading.

Spam, rice and eggs is so ubiquitous in Hawaii that it’s even sold at McDonald’s, part of their breakfast menu. That also indicates what kind of a breakfast it’s going to be. But, never fear. Much like the rice bowl, you can easily add veggies to the top of your rice to make it a more balanced meal.

Spam, rice and eggs is so simple, almost dead simple. Simply cut a couple of pieces off of the spam log, fry them up in a pan, heat up some leftover sushi or vinegared rice (you can also use normal steamed rice, fresh or leftover) and cook a couple of eggs in that same pan, either fried or scrambled. Put some furikake (Japanese seasoning made with seaweed, among other things) on the rice, maybe cut up a few veggies to put over the rice and there, you have it.

Spam, rice and eggs. Simple, wasn’t it?

Next up, according to my thinking? Spam, (sushi) rice and eggs in a burrito. New Mexican and Hawaiian fusion, all the way.

See the full set of photos (see below) on Flickr.

All the photos are released under a Creative Commons Attribution Only (2.0) license.

Spam, rice and eggs

Spam makes a great breakfast food when paired with some rice and eggs.
Prep Time15 minutes
Cook Time15 minutes
Total Time30 minutes
Course: Breakfast
Cuisine: American, Hawaiian
Keyword: spam
Servings: 2 people
Author: Wheeler Cowperthwaite
Cost: $5

Ingredients

  • 1 can of spam
  • 2-5 eggs
  • Vegetables as desired
  • Rice leftover or fresh
  • Milk if making scrambled eggs
  • 1 tablespoon oil
  • Butter (optional)

Instructions

  • If using fresh rice, make it now. I suggest making sushi/vinegared rice, either fresh or left over.
  • Heat a large pan over medium-high heat.
  • Take the spam out of its package and slice into 1/4 inch slices.

  • Fry the spam until lightly brown on each side
  • Cut up any vegetables desired to be used on the rice
  • Prepare eggs for scrambling, if cooking that way, including mixing and adding milk.
  • Cook the eggs as desired.
  • Serve the spam with the rice and eggs.


Spam cut into slices before it goes into the skillet for some light browning.

The spam has pan fried up nicely. Just a little brown. I cook on the grill because it doesn’t make the house smell.

Flippin’ the spam slices.

One-handed egg crackin’.

Pouring milk into the eggs before everything is mixed. Scrambled eggs, this time.

Finished spam, rice and (scrambled) eggs. Furikake is on the top of the sushi, or vinegared, rice.

So, what’s for dinner?

That’s always a problem, right? Pasta, or . . . What else is in the kitchen? Refrigerator? And the time factor? Do I need to go to the store?

In my house, there are a few things always on hand: vegetables, maybe some meat (leftover, marinated or unprepared), always uncooked rice (and often times, leftover sushi/vinegared rice, plain recipe).

For me, the easiest meal is often times the humble rice bowl. I cook up some rice in my rice cooker, I turn it into sushi/vinegared rice (blog post). Then, do I want to make sushi? Or a rice bowl? Or maybe onigiri? Or maybe, a few sushi rolls now and rice bowls for lunch tomorrow, and some onigiri (rice balls) for later? The options are endless.

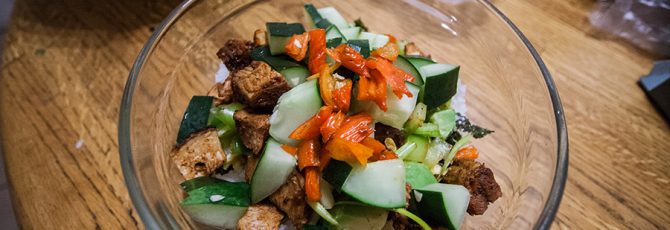
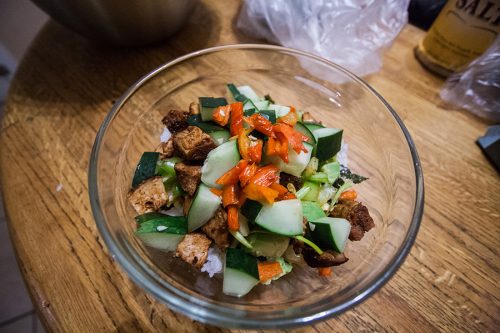
Peppers, grilled chicken, cucumbers and seaweed, at the very bottom, sit on top of rice in this rice bowl.

So, what is the rice bowl?

Well, it’s simple. You make some vinegared/sushi rice, put it in a bowl, cut up some veggies into bite-sized pieces, maybe cook up some meat and cut it up too, then throw it all on the rice.

Which veggies? Well, cucumbers are always nice, as are avocadoes. If you thinly slice, then deseed lemons, they are delicious. Being in New Mexico, I always add green chile peppers (unroasted) as well as jalepenos. Nori (seaweed) adds much needed taste. Green onions are also a good addition.

What else do you have? Throw it in there! Leftover steak? Cut it up, throw it in. Same goes for chicken, pork, or other meats.

Add some soy sauce, maybe some spicy/Sriracha mayonnaise, maybe some eel sauce, (Link to Amazon; once I make my own, I will post the recipe and update the link. Your local Asian store should have it for cheap.)

Bam! You’ve got a simple, relatively healthy dinner. Veggies, a little meat. Sure, the rice isn’t particularly healthy, but it’s frugal. Very, very frugal.

Avocados! Taste delicious in rice bowls, as do lemons. Seaweed is also a must.

(I buy sushi rice, Kokuho Rose variety, in 40 pound bags to be as frugal as possible. I store them in five-gallon buckets with lids, a carry over from my days as a homebrewer.)

There you go. Rice bowls. Simple. Delicious. Easy.

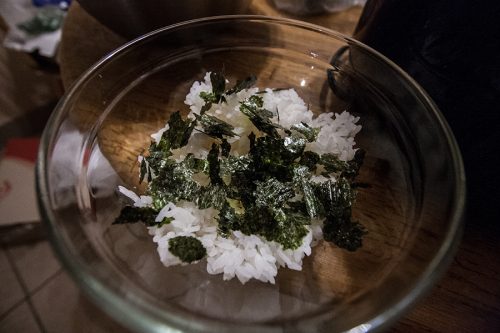
Seaweed (nori) is the first thing to go on top of the rice.

See all the photos on Flickr, in high quality.

Realized you don’t know how to make sushi rice? Here’s the recipe.

Want just the rice bowls recipe? Right here.

Simple rice bowls

Makes: as many as you have rice for

Ingredients

Sushi/vinegared rice
1/2 to 1/4 cucumber
1-3 green peppers
1 jalapeno (if you like it spicy)
1 piece of cooked meat (heated up if desired)
1/2 sheet of nori (seaweed sheets)
1 avocado
1 lemon, thinly sliced
All other vegetables, cooked or raw, as you see fit
Other ingredients as you see fit, or have seen in a sushi roll
Condiments such as eel sauce, Sriracha mayonnaise and eel sauce or cream cheese

Directions

1. Cut up the vegetables into bite-sized pieces. Cut the lemon slices into quarters.
2. Put enough rice into the bottom of a bowl.
3. Tear up the nori and place on top of the rice.
4. Put the cut up vegetables and meat, if using, on top of the nori, which is on top of the rice.
5. Heat up in the microwave for 30 second to 1 minute if working with leftovers or desire it hotter
6. Add condiments over the top and enjoy.

Tzatziki, a yogurt sauce made with lemon juice, dill, and a few other ingredients, is a fantastic side to a variety of dishes, including zucchini fritters, curry fried rice and hummus, especially when paired with pita bread.

(Skip to just the recipe)

It also goes very well as a compliment to zhug (a hot sauce made of cilantro, peppers and lemon/lime juice) creating what for me is the ultimate quadfecta in pita and falafel sides: zhug, Tzatzikihummus and tabbouleh.

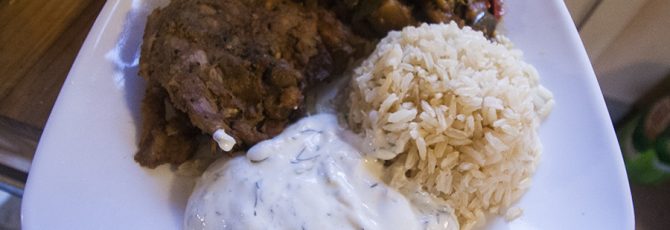
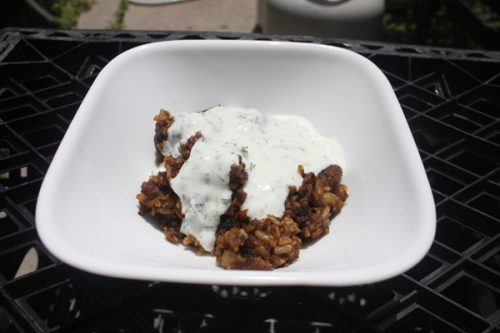
Tzatziki poured over curry fried rice makes an easy and delicious meal. All this is missing is some zhug.

There are a couple of things to consider when making tzatziki, aside from how to spell it.

The first is what kind of yogurt to use. I use full-fat plain yogurt or, if I’m going through a DIY phase, I use yogurt I’ve made from whole milk.

Plain full-fat yogurt is superior (in my opinion) to the more popular and prevalent fat-free and 99 percent fat free options because it has less sugar.

Yogurt makers add sugar to make up for the taste of the lost fat. Naturally occurring fat is a lot more healthy than artificially added sugar. Less sugar, less problems.

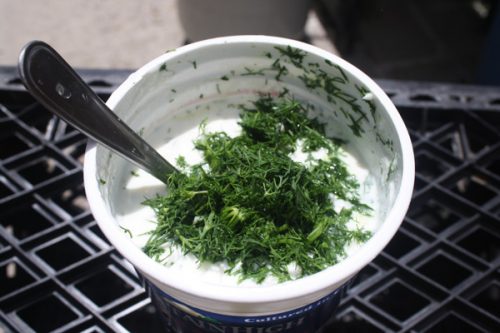
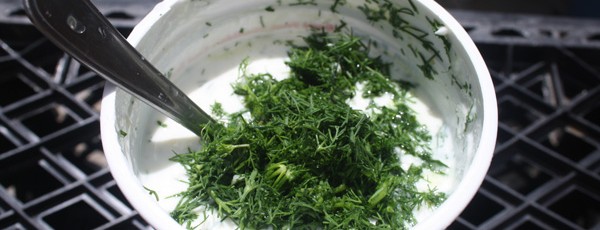
Dill piles up in a container of yogurt being used to mix the tzatziki.

Second,  good dill, which can be surprisingly hard to find. When I find it, I buy a large bunch. You can also add some chopped mint to the batch, if you’re feeling a little adventerous or have mint on hand. If I have it, I add it. If I don’t have any available, then it doesn’t go in.

Tzatziki is more like art than science. The amount of lemon juice used, of dill, of lime juice, of salt, of garlic, everything is up for interpretation.

For just the recipe, see the page here.

Wheeler's Dill-icious tzatziki

This yogurt staple is heavy on the dill, lemon, and lime and offsets the saltiness in many foods.
Prep Time30 minutes
Total Time30 minutes
Course: Side Dish
Cuisine: Mediterranean
Servings: 2 cups
Author: Wheeler Cowperthwaite

Ingredients

  • 2 cups plain yogurt
  • 2+ tbsp finely chopped fresh dill more as desired/to taste
  • 2+ tbsp lemon juice more to taste
  • 1-2 tbsp lime juice
  • 2 cloves garlic, finely minced
  • 1 pinch black pepper
  • salt to taste
  • 1 tbsp fresh mint, finely chopped (optional)

Instructions

  • If thicker tzatziki is desired, either buy “Greek” yogurt or strain regular yogurt by placing a cheesecloth in a strainer, and the strainer in a bowl, and pouring the unstrained yogurt into the cheesecloth lining. Cover and let sit in the refrigerator overnight or for 8 hours.
  • Chop garlic, dill and, it if is being used, mint.
  • Mix yogurt in a medium bowl with all of the ingredients except for salt, until will combined.
  • Salt to taste immediately and use or refrigerate for 8+ hours and then salt to taste.

Thanksgiving is tomorrow, which means you need recipes! I am here to provide a few. Click the links for the recipes.

Alternately, all the recipes are listed here.

The sides

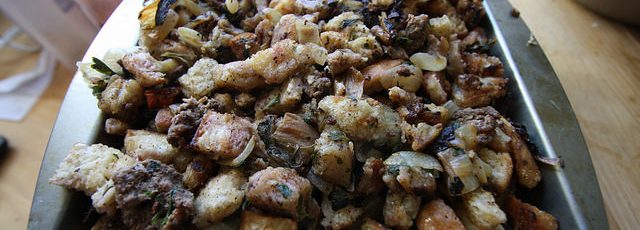
Sage sausage stuffing with sourdough bread.

Tastes fantastic.

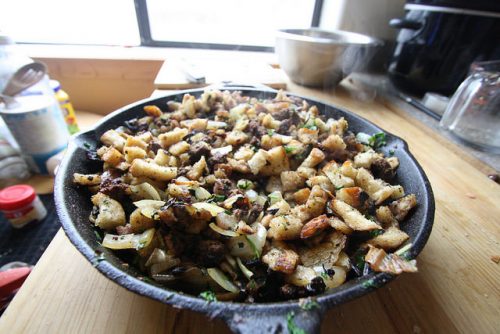
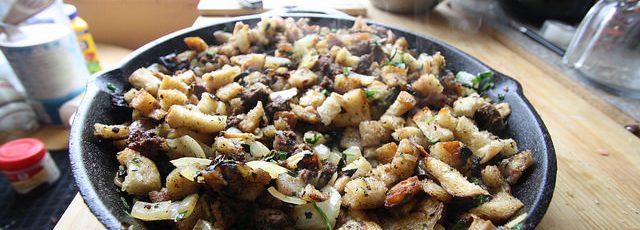
Stuffing before being placed in the oven. Although cast iron is great for baking, it tends to burn the bottom of the stuffing. Glass is preferred.

Stuffing before being placed in the oven. Although cast iron is great for baking, it tends to burn the bottom of the stuffing. Glass is preferred.

Bacon Brussels sprouts

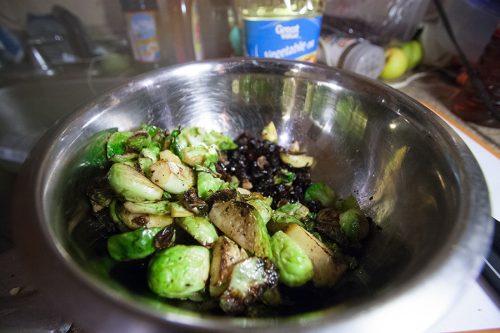
If the skillet isn't large enough do it in batches.
If the skillet isn’t large, cook the sprouts in batches.
Ugly beans

The gravy

Make-ahead turkey giblet gravy

Make-ahead turkey giblet gravy infused with port

Dessert

Pumpkin dump cake

pumpkin-dump-cake-with-cool-whip-900x600-3

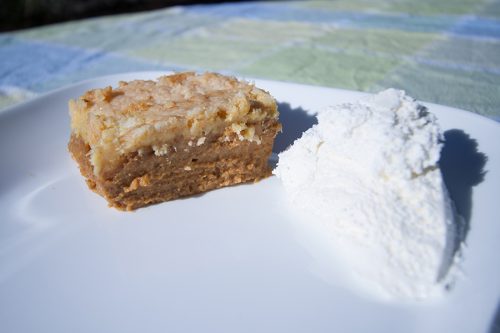
Dump cake with non-dairy whipped topping, which looks like ice cream.

Cobbled pumpkin pie

For this dish, consider using the pumpkin mixture recipe in the dump cake.

Pumpkin pie after being baked.

Pumpkin pie after being baked.

Key lime pie (needs to be frozen)

It's the pie! Pre-freezer, though.

It’s the pie! Pre-freezer, though.

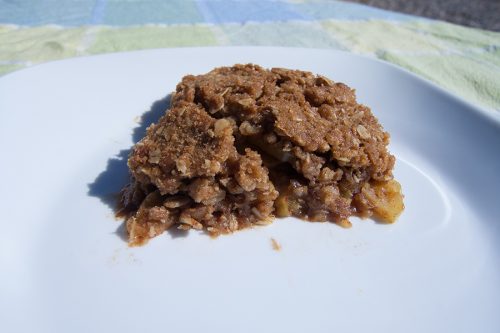
Boozy apple crisp

The boozy apple crisp is good. Not amazing, but good.

Really, just choose any dessert.

Drinks

The Holiday Mule

Sparkling Wine and Cranberry Cocktail

sparking-wine-cocktail-4-of-9-900x600

Cranberry juice and sparkling wine make a great combination for those who do not like the bubbly by itself.

The Ginger Beer Shandy

The ginger beer shandy casts a pretty shadow.

The ginger beer shandy casts a pretty shadow.

Glühwein

Way too hot. My bad! No boiling allowed!

Way too hot. My bad! No boiling allowed!

Two Recipes for Some Thanksgiving help

Thanksgiving is right around the corner which means, if you have to cook any part of the meal, you’re scrambling for ideas, for  ingredients, for menu planning, for drinks, for the whole shebang.

I’ve been there before and I’m going to be there again this year which means I’m scrambling as well.

I know a few parts of the meal ‘m going to be making already. Obviously, there’s the turkey. That’s a given. Then there’s the gravy. (Here’s the full recipe.) That’s something where the majority can be made ahead of time.

Then there’s the stuffing which I rarely stuff inside of the turkey. (I like to put a few lemons, maybe a lime, some apples, maybe an orange, in the bird’s cavity.)

I personally make a sage sausage stuffing with sourdough bread and bake it in the oven. This makes it toasty and more delicious.

There’re two options for the sage sausage. Either, make it yourself or just buy it. When it’s on sale, I buy it. When it’s not, I make it myself with fresh sage which I then dry in the oven.

There you go. Two great options.

I highly suggest you take my advice on the gravy.

Either use the links above or see the recipes below.

Make-ahead turkey giblet gravy

This make-ahead gravy assures there will be plenty for the meal and beyond
Course: Side Dish
Servings: 1 quart
Author: Wheeler Cowperthwaite

Ingredients

  • 1/2 cup butter More as required
  • 1/2 cup flour More as required
  • 5-6 cups water
  • Turkey giblets heart, liver, gizzard (Chicken giblets work also)
  • 6-10 pepper corns
  • 1 Turkey neck
  • 2 bay leaves
  • 1 carrot
  • 1 onion
  • Salt to taste
  • Turkey pan drippings
  • 1-2 cups Optional: 1-2 cups white or red wine More as required for deglazing
  • 1-2 cups Optional: Chicken or beef broth
  • Optional: 1 celery stick

Instructions

  • Put the water in a medium pot on high heat and set to boil.
  • Add the turkey neck, all giblets (chicken giblets also work), bay leaves and pepper corns to the pot of water.
  • While the water comes to a boil, cut the carrot and onion into quarters and add to the pot.
  • When water boils, cover, turn heat on low and simmer for at least 1 hour but preferably for 2 and 1/2 hours or longer. The longer the simmer, the better the stock.
  • While the stock simmers, either combine the butter and flour in a small bowl or put a skillet on medium heat, put the butter in the skillet and slowly whisk in the flour. Continue to whisk until it begins to turn golden brown. Remove to a separate bowl. This is the roux.
  • When the stock is done simmering, strain the stock and return to the pot it was simmered in. Add chicken or beef stock, if using.
  • Remove the turkey neck, heart and liver from the strainer. Remove the meat from the neck and finely mince. Finely mince the heart and liver. Add back to the stock and throw the rest of the material in the strainer away.
  • Add the roux to the stock. Stir until well combined. Add wine, if desired. Put on low heat and simmer if the gravy is too thin or make and add more roux.
  • If using turkey and pan drippings: Once the turkey has been removed from the pan, add a little water or wine, depending on how much liquid is in the pan, and deglaze over a medium-high heat, scraping the browned bits from the bottom.
  • Add the pan drippings to the gravy and stir until well combined. A little more flour may be required to be added.
  • Freeze or put in the refrigerator if being made significantly ahead of the serving time.


HOMEMADE SAGE SAUSAGE STUFFING

The sage sausage

Ingredients

1 lb ground pork or beef or other ground meat(s)

½ teaspoon ground coriander seeds

1 teaspoon salt

1-3 teaspoons dried, rubbed sage

½ teaspoon black pepper

Directions

If drying fresh sage, put sage leaves on a cooking sheet lined with parchment paper for 1-2 hours at 150-180 degrees Fahrenheit.

Mix the meat and spices, possibly by hand, until well combined.

Refrigerate overnight or cook immediately.

Sage sausage stuffing

Ingredients

8 cups sourdough bread cubes, dime to quarter sized pieces, which is a little under a pound and

half. Rye or whole wheat also make for good stuffing)

1 lb. sage sausage

1 cup bok choy (or other vegetable of one’s choosing, such as celery)

2 chopped medium onions

1-2 cups minced parsley

Directions

Preheat oven to 350 degrees if any of the stuffing is to be baked.

In a large skillet (12 inches), cook the sausage, separating it into quarter-sized pieces. Once it is almost done cooking, remove the sausage into a bowl.

Brown the onions and bok choy (or other vegetables as desired).

Add the sausage back into the skillet, as well as the cubed bread. Mix and continue to cook over medium-high to medium heat, until the bread begins to heat through.

Stuff the turkey with the stuffing or put the stuffing into baking dishes.

If baking the stuffing alone, bake at 350 Fahrenheit for 40 minutes with a tinfoil covering.

Remove the tinfoil covering and continue to bake for 20 minutes.