(Skip to the recipe)

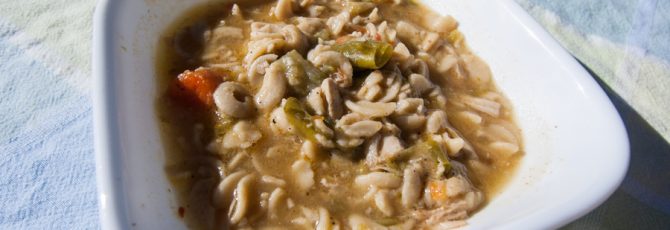
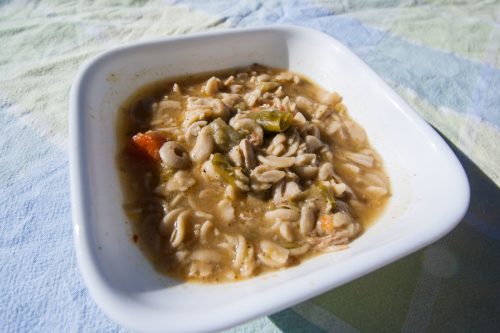
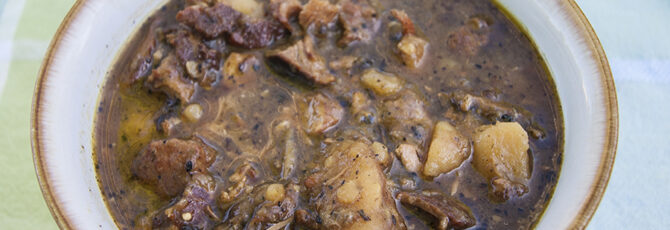
Perhaps the most fitting meal for winter is the spicy stew. Bubbling in a pot on the stove for hours on end, it’s a filling meal that warms the body, warms the soul and warms the taste buds.

I have my own take on classic green chile stew, which assumes that there are no leftover roasted chiles from the roasting season and that you know how much heat you can tolerate.

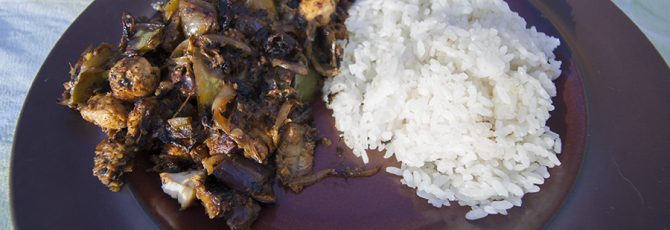
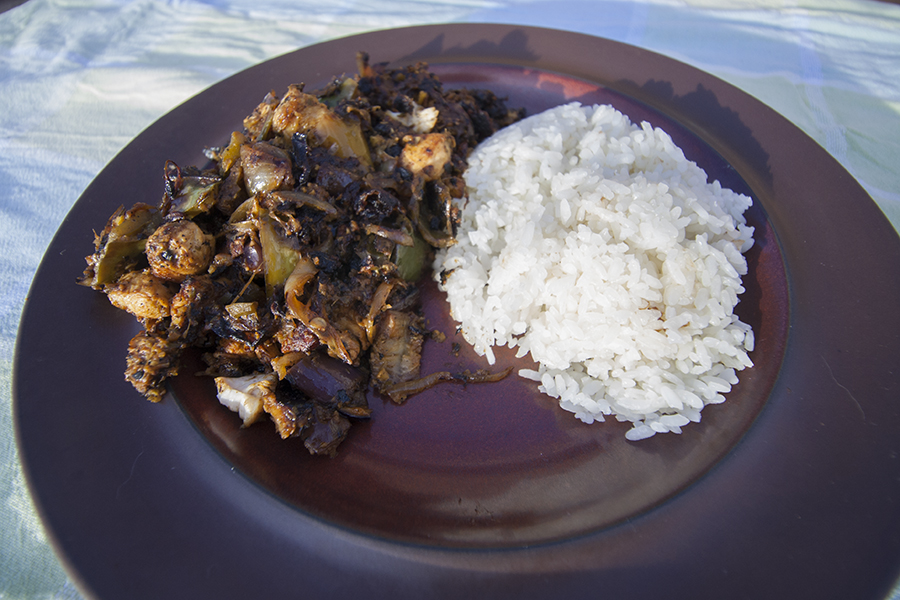
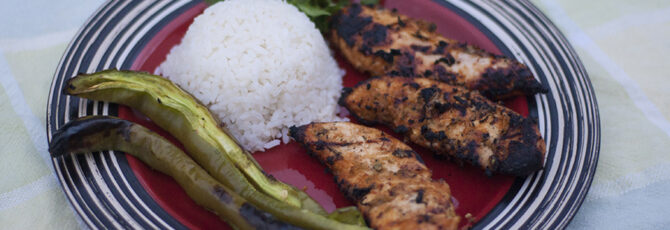
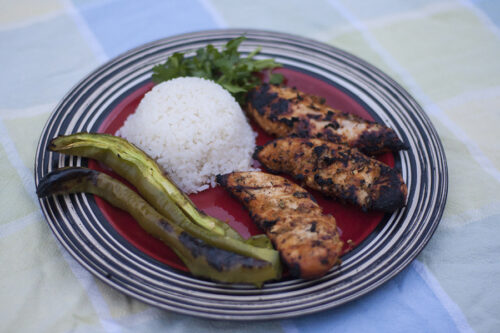
This stew gets its classic smoky flavor both from the use of vegetables roasted in the oven – chiles, onions and tomatillos – and from bacon.

When I first started working on this recipe, I used two to three pounds of chiles. To me, that was not nearly enough, and future iterations were made with four to five pounds.

I also have a taste for the acidic. I love a hot and sour soup, which gets its sour from vinegar. In this case, I like to add some lemon and lime juice to the stew to give it a little more of an acidic kick than might be in the usual green chile stew recipe. More importantly, the little addition of acidity really made the flavors pop, just like a tiny bit of salt when the stew is being served that unlocks the flavor of a dish.

The recipe is broken into a few different parts. The first is the roasting of the vegetables. Recipes follow into two camps: a Dutch oven or on baking sheets. If you go with a baking sheet, use parchment paper instead of aluminum foil because all the liquid the vegetables release will make them stick to the metal. Also, make sure they are far enough apart that they aren’t steaming each other.

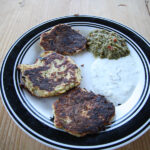
I included potatoes in my recipe to add a starch, but they are by no means required. Rice is another option.

The beef or chicken stock will add plenty of salt to the stew, but if more is desired, add additional salt — and pepper — at the very end of the cooking process, or even make sure a salt shaker is available when serving. I find that each person usually has a different level of ideal saltiness, which is better served by slightly under salting than over salting a dish.


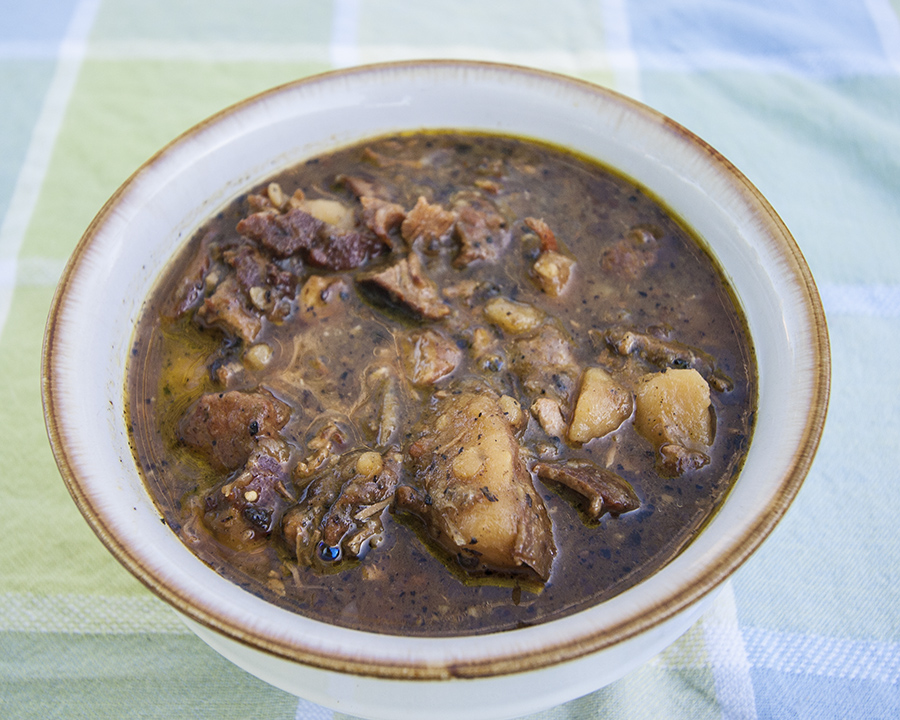
This green chile stew may not be green as chile verde, but it is just as delicious.


Ingredients

  • 4-5 pounds chile peppers
  • 4-5 tomatillos
  • 2 medium onions
  • 2-3 pound beef or pork roast
  • 5 cloves of garlic, chopped
  • 1 pound bacon (optional)
  • 5 red potatoes, cut in quarters (optional)
  • 5 cups chicken or beef stock
  • 1 tablespoon cumin
  • Vegetable or canola oil
  • Lemon and lime juice
  • Salt and pepper
  • Water as required


Directions

  • Preheat the oven to 400 degrees
  • Wash all the peppers and tomatillos
  • Cut all of the peppers in half, take off the stems, deseed if desired and cut the onion into quarters
  • Either place the peppers, onion and tomatillos into a Dutch oven or place them, skin-side up, onto baking sheets lined with parchment paper. Sprinkle vegetable or canola oil over the vegetables.
  • Roast for 40 minutes to 1 1/2 hours, until very fragrant.
  • While the peppers are roasting, cut the pork or beef roast into 1-inch cubes.
  • In a medium pan, fry the bacon. Remove the bacon to a side dish.
  • In the same pan, begin browning the pork cubes in small batches on high heat. Do not crowd the cubes. If not using bacon, brown with oil.
  • Remove the pork cubes to a separate dish.
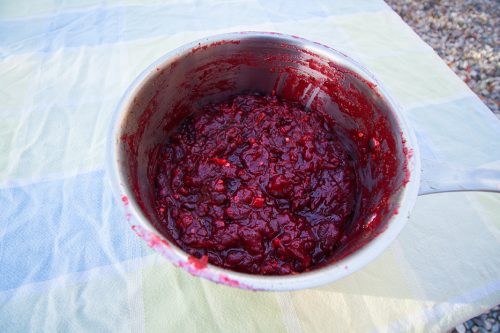
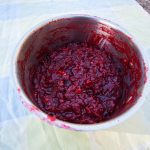
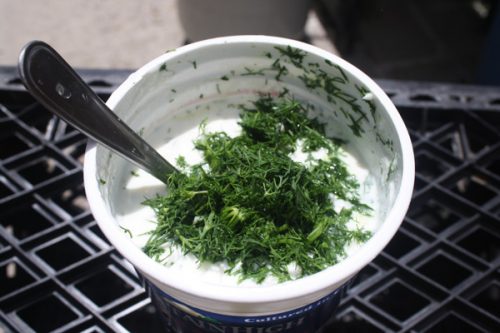
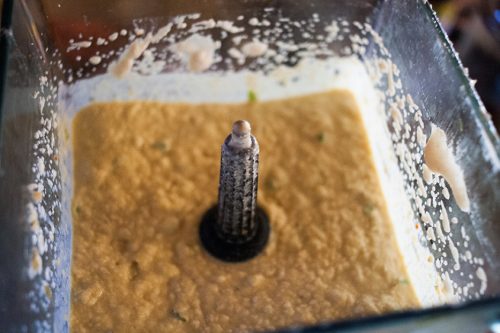
  • When the vegetables are done roasting, put them into a food processor or blender along with the chopped garlic. Add 1/4 to 1/2 cup lemon juice. Blend until pureed.
  • Add the chicken or beef stock to a large pot, along with the vegetable puree, pork/beef, bacon if being used, cumin, bones (if a bone-in roast was used) and potatoes.
  • On medium heat, bring to a simmer. Reduce to low heat, and stirring occasionally, simmer for 2 to 5 hours.
  • If the liquid level gets too low, add water or stock.
  • When done, remove the bone to a dish. Remove any remaining meat from the bone and add the meat back to the stew. Throw away the bone.
  • Salt and pepper to taste.
  • Add 1/4 cup lemon juice and 1/4 cup lime juice to the stew and stir in. Add more juice as desired or to taste.
  • Serve or cool and serve the following day.

A while ago, my mother had to take her boyfriend to the emergency room, which turned into a hospital stay.

Turns out, it was congestive heart failure.

The doctors suggested a few lifestyle changes including a change in diet. They asked him to lower the amount of sodium he consumes each day. That mostly comes from salt, but also lots of prepared foods.

The doctors suggested a low-sodium diet because it helps with a lot of things: kidney failure, high blood pressure (also called hypertension), diabetes and lupus. There’s a problem. Going low sodium is hard, especially because salt often adds just that kick to a dish that turns it from ho-hum to fantastic.

After I got the news, I started to pay attention to my own sodium consumption. One of the easiest ways to control sodium intake is to cook at home because the cook controls the amount of salt. According to the Food and Drug Administration, packaged and restaurant foods are responsible for 70% of our sodium intake.

I am not a particularly high risk for congestive heart failure and there is no medical reason for me to reduce my salt intake other than, Americans eat too much salt. According to the Food and Drug Administration, we eat an average of 3,500 mg of sodium a day, but their guidelines cap the daily recommended dose at 2,300 mg, about a teaspoon of salt. Those with high blood pressure should further reduce intake to 1,500 mg a day.

For the new year, I’ve decided I should reduce my salt intake. That means using more herbs and spices, using low-sodium versions of things like soy sauce and using more flavorful oils.

If I needed to cut back my salt to levels acceptable for someone with high blood pressure, it would be a rough couple of months. Dick Louge, in his cookbook “500 Low Sodium Recipes,” wrote it took a month, on a 1,200 mg sodium diet, before he no longer craved salt.

“Today, a ‘normal’ salted potato chip tastes way too salty to me,” he wrote.

I can relate. When I lived in Germany, I found that most restaurant food, but especially Turkish kebabs, were just way too salty for my American taste buds, almost too salty to eat. When visiting Sarajevo in Bosnia and Herzegovina, I had a few kebabs and, to my surprise, they were not too salty at all. I then realized, it wasn’t me. It was the Germans.

I decided that a stir-fry would be a recipe to start thinking about how much salt goes into a dish and how to make something taste better when there is less salt.

The first step was to look at the labels of the basics, including chicken stock and soy sauce. One can of chicken stock contained 750 mg of sodium per one cup, compared to just 250 mg for the low-sodium version. A single tablespoon of an average soy sauce has 879 mg of sodium compared to Kikkoman’s low-sodium version with 575 mg per tablespoon.

The second step was to take stock of the fresh herbs and spices I could use to add flavors to the dish. Those included mint, basil, ginger, lemon and mushrooms. Thai basil and holy basil are also good additions, although have a spicier taste than Italian basil.

One thing to consider about lemon is that the rind of the lemon, when it is still pliable and fresh, a more bright yellow, makes a great addition to sauces and dishes. The rind is delicious, either cut up, sliced or as lemon zest.

The third step was to consider other ingredients in a dish, in this case, the oil, and seeing if there are more flavorful substitutes. That meant moving from canola oil to sesame oil.

This recipe will leave you wishing there was just a little bit more salt, and maybe a little bit more soy sauce, or a little oyster sauce, would be in order, but going low sodium takes a little time.

This low-sodium stir-fry relies on ginger, basic, mint, lemon and chiles to bring out lots of flavor while reducing the amount of sodium.


Low-sodium chicken stir fry

Cutting down on the amount of sodium in a stir fry requires getting flavor from other ingredients, especially herbs.
Prep Time30 minutes
Cook Time15 minutes
Total Time45 minutes
Course: Main Course
Cuisine: American
Keyword: low sodium, stir fry
Servings: 2 people
Author: Wheeler Cowperthwaite

Ingredients

  • 1/4 cup chopped basil fresh
  • 2 tablespoons chopped mint
  • 2 chopped green onions chopped
  • 2 cloves chopped garlic
  • 2 tablespoons chopped fresh ginger
  • 1/2 to 1 lemon de-seeded
  • 1 pound chicken breasts or thighs cut into bite-sized pieces
  • 2 tbsp low-sodium soy sauce
  • 1 small onion, chopped
  • 3-6 green chiles, chopped
  • 1 small eggplant cut into bite-sized pieces
  • Red, yellow or orange bell pepper, sliced into bite-sized pieces, or (optional)
  • broccoli or any other vegetables available, sliced into bite-sized pieces (optional)
  • sliced mushrooms (optional)
  • 3/4 cup low-sodium chicken broth/stock

Instructions

  • In a blender or food processor, mix the basil, mint, 1/4 cup of broth, green onions, garlic, 1 tablespoon chopped ginger and lemon. Blend until minced.
  • Cut the chicken into bite-sized pieces and combine with the soy sauce. Let it briefly marinate.
  • Chop the onion, chiles, eggplant or other vegetables being used.
  • In a large pan over high heat, add the sesame seed oil. Once the pan is very hot, add the vegetables and cook until tender, 4-8 minutes. Remove to a bowl.
  • Add another tablespoon of sesame seed oil and add the basil-lemon-ginger-mint mixture and cook for 1 minute, stirring.
  • Add the chicken, marinade and 1 tablespoon finely chopped ginger to the pan and cook until done, 2-3 minutes.
  • Add the 1/2 cup of stock, bring to a boil, and re-add the vegetables to the pan. Cook for another 1-3 minutes. Serve with rice or noodles.

Notes

Adapted from the Mayo Clinic’s chicken stir-fry with eggplant, basil and ginger. At a serving size of two cups, the sodium level should be 395 mg.

Cooler winter days cry out for a change in menu, for something that stays hot during the whole meal, that feels like the enveloping warmth of a dinner lit by a fireplace and candles.

Now is the perfect time to break out the cognac, slice some French bread (or sourdough), get out the little tureens and impress family, friends, or a date, with perhaps the most romantic soup: the French onion.

Like so many French recipes, this will involve bread and cheese, butter and onions, cognac and time. Some of the time will be spent attentively watching onions as they slowly brown in butter, but the majority of the time can be spent away from the stove as the soup simmers, and simmers, and then simmers some more.

French onion soup starts not with onions, or French bread, or nice cheese, but with stock, which builds the base everything else is built on. There are many strongly held beliefs on the stock that should form the base of the French onion soup.

Some call for making your own veal stock, with pounds of veal neck bones, or veal shanks, roasted in the oven, then boiled for at least two hours. Others call for making your own beef broth, with beef neck bones.

Still others say store bought beef broth will do, even the low sodium kinds, or even chicken broth, although if you have a turkey carcass still being covered, consider turning it into stock. Still some say skip the animals and go straight to vegetable broth.

Bon Appétit’s Chris Morocco goes so far, in his “French-ish Onion Soup” to get rid of stock altogether, instead letting the namesake of French onion soup to do all the work.

This recipe is a bit of a hybrid. I’ve pulled from a few different sources, including Morocco, Julia Child and Petit Trois, the French bistro in Los Angeles and Sherman Oaks. (They’re the ones who call for six pounds of veal neck bones.)

This recipe comes in a few parts. You can serve the soup with toasted French bread (or sourdough) on the bottom, on the top or float it on the top, cover it in cheese and bake it in the oven. You take it up a notch with an egg yolk, Worcestershire sauce and some extra cognac for a deluxe soup.

This recipe can easily be vegan, by omitting the cheese, using vegetable broth and using olive oil instead of butter, or just vegetarian, with the use of vegetable broth.

One final note: French onion soup takes time. There are no shortcuts and there is no cheating. You can’t increase the heat on the stove to make the onions brown faster.

French onion soup takes time is well worth the wait. Photo by sousvideguy/Flickr.


Ingredients


For the soup

2-3 pounds thinly sliced yellow onions

4 tablespoons butter or olive oil

1 tsp salt

¼ tsp sugar

3 tbsp flour

8 cups of stock — beef, chicken or vegetable

½ cup dry white wine or dry white vermouth

3 tbsp cognac

1-2 cups grated Swiss or Parmesan cheese


For the toasted French bread

8 slices of French bread or sourdough bread, cut ¾ to 1-inch thick

Olive oil

Grated swiss or Parmesan cheese


Directions

Heat a heavy, 4-quart saucepan over medium heat until hot. Add 3 tablespoons butter and 1 tablespoon oil and all the thinly sliced onions. Turn heat to medium-low and cook the onions slowly for 15 minutes, while covered.

Uncover the saucepan, raise the heat to medium, and stir in the 1 teaspoon salt and ¼ teaspoon sugar, which will help them brown. Cook for 30-60 minutes, stirring frequently, until they have turned an even, deep and golden brown. They should be evenly golden, but not mushy.

Sprinkle the flour over the cooked onions and cook for another 3 minutes.

Preheat the oven to 325 degrees.

In a separate pot, bring the stock to a boil.

Take the saucepan off the stove, once the onions are done, and blend in the 8 cups of stock, the white wine or vermouth, and add salt and pepper to taste.

Return the saucepan to heat and simmer for 30-40 minutes. Add salt and pepper as needed.

While the soup simmers, put the bread on a roasting pan and bake for 30 minutes, until the slices are dried out and lightly browned. After 15 minutes, baste each side with a teaspoon of olive oil. After the bread comes out of the oven, rub each piece with a cut piece of garlic.

Just before serving, stir in 3 tablespoons of cognac.

Either:

Pour the soup into individual soup cups or tureens, on top of the rounds of bread and pass out grated parmesan and Swiss cheese to be added by guests or

Pour the soup into individual oven-proof cups or tureens and float the rounds of bread on top and spread the grated Swiss and Parmesan cheese on top, then sprinkle with olive oil or butter.

Bake for 20 minutes in the oven and finish under a preheated the broiler for 1-2 minutes until the cheese on top of brown and serve immediately.

Recipe adapted from Julia Child, Chris Morocco and Petit Trois.

As the weather begins to cool, I find that its time to think about warming foods, hearty foods and perhaps, most importantly, what to serve at dinner parties that will impress, will wow, that can double as a Sunday dinner, or even work for a holiday, like Christmas.

Enter beef bourguignon, the long-simmering French delicacy, a hearty beef stew made with a base of red wine (typically, burgundy), that takes hours to make and longer to simmer but is well worth the wait. Like most stews, it tastes even better the next day.

This French stew gets much of its richness from browning the beef before it goes into a pot, which then goes into the oven, for the long simmer (two to three hours). The rest comes from the wine that serves as the stew’s base, three cups of a full-bodied young red wine, like Chianti.

So too does richness come from pork fat, added in the form of blanched bacon, put in boiling water to remove its signature smoky taste.

Really, though, the richness in the recipe comes from a whole host of places. So too does it come from the pound of fresh mushrooms, sautéed in butter, and the small white onions, braised in stock.

The mushrooms, and onions, have their own set of instructions in the recipe, and should be done while the stew is in the oven.

When done correctly, the mushrooms will be lightly brown and will not exude their juices while being cooked. For this to happen, the mushrooms need to be dry, the butter needs to be very hot and the mushrooms can’t be crowded in the pan. Sauté too many at once, and they steam, instead of browning. If you don’t have a large enough pan or a hot enough stove, consider making the mushrooms in multiple batches.

The cooking for this recipe is done in either a large casserole dish (I’m a fan of enameled cast iron, like Le Creuset or Lodge), for the stew proper, or in large skillet, for the mushrooms and onions.

While it might be a stew, most of the long cooking time is spent in a casserole dish or pot in the oven. This is done to create a more uniform heating, rather than just the heating element at the bottom of the pot.

This recipe should serve six, with a basic ratio of 1 pound of beef per two people.

Julia Childs writes in “Mastering The Art of French Cooking” that beef bourguignon is typically served with boiled potatoes, but buttered noodles work as well. Personally, I enjoy some warm bread, either a crusty sourdough or a French baguette, with a little butter.

Mastering the art of beef bourguignon (a French beef stew with a red wine base) could be the key to a new Christmas dinner tradition.


Ingredients

6 slices bacon, cut into small strips or cubes

3 1/2 tablespoons extra-virgin olive oil

3 pounds stewing beef, cut into 2-inch chunks

1 large carrot, sliced

1 large white onion, sliced

1 pinch coarse salt and freshly ground pepper

2 tablespoons all-purpose flour

3 cups red wine

2 1/2 to 3 1/2 cups beef stock

1 tablespoon tomato paste

2 cloves smashed garlic

1/2 teaspoon thyme

1 crumbled bay leaf

3 1/2 tablespoons butter


For the onions

18 – 24 small pearl onions

½ cup chicken stock, white wine or water

2 tablespoons butter

1 herb bouquet (4 sprigs parsley, 2 sprigs thyme, 1 bay leaf)


For the mushrooms

1 pound fresh mushrooms, quartered

2 tablespoons butter

1 tablespoon oil

Salt and pepper


Directions

Remove rind from the bacon and cut bacon into sticks 1 ½ inches long. Simmer rind and bacon for 10 minutes in 1 ½ quarts of water. Drain and dry. Skip this step to retain some smoky flavor in the stew.

Preheat oven to 450 degrees.

In a 9- to 10-inch fireproof casserole, at least 3 inches deep, Sauté the bacon in the oil over moderate heat for 2 to 3 minutes to brown lightly. Remove to a side dish with a slotted spoon. Set casserole aside. Reheat until fat is almost smoking before you sauté the beef.

Dry the stewing beef in paper towels; it will not brown if it is damp. Sauté it, a few pieces at a time, in the hot oil and bacon fat until nicely browned on all sides. Add it to the bacon.

In the same fat, brown the sliced vegetables (but not the mushrooms or pear onions). Pour out the sautéing fat.

Return the beef and bacon to the casserole and toss with the salt and pepper. Then sprinkle on the flour and toss again to coat the meat lightly with the flour. Set casserole uncovered in the middle position of the preheated oven for 4 minutes. Toss the meat and return to the oven for 4 minutes more. (This browns the flour and covers the meat with a light crust.) Remove casserole, and turn the oven down to 325 degrees.

Stir in the wine and enough stock or bouillon so that the meat is barely covered. Add the tomato paste, garlic, herbs, and bacon rind. Bring to simmer on top of the stove. Then cover the casserole and set in the lower third of the preheated oven. Regulate heat, so liquid simmers very slowly for 2 ½ to 3 hours. The meat is done when a fork pierces it easily.

While the beef is cooking, prepare the onions and mushrooms. Set them aside until needed.

For the onions, place them in a saucepan or skillet with ½ cup white wine or chicken stock. The butter and the herb bouqet. Cover and simmer very slowly, rolling the pearl onions in the pan periodically, for 40-50 minutes. The onions be tender but keep their shape. Add more liquid if it all evaporates. Remove the herb bouqet and reserve.

For the mushrooms, put a skillet on high heat with the butter (2 tablespoons) and oil. Once the butter foam subsides, add the mushrooms. Toss and shake in the pan for 4 to 5 minutes. In the first few minutes, they should absorb the fat, which will reappear on the surface as they begin to brown. Once browned, remove to a separate dish until later on.

When the meat is tender, pour the contents of the casserole into a sieve set over a saucepan. Wash out the casserole and return the beef and bacon to it. Distribute the cooked onions and mushrooms over the meat.

Skim fat off the sauce. Simmer sauce for a minute or two, skimming off additional fat as it rises. You should have about 2 1/2 cups of sauce thick enough to coat a spoon lightly. If too thin, boil it down rapidly. If too thick, mix in a few tablespoons of stock or canned bouillon. Taste carefully for seasoning. Pour the sauce over the meat and vegetables. The recipe may be completed in advance to this point.


For immediate serving: Covet the casserole and simmer for 2 to 3 minutes, basting the meat and vegetables with the sauce several times. Serve in its casserole, or arrange the stew on a platter surrounded with potatoes, noodles, or rice, and decorated with parsley.


For later serving: When cold, cover and refrigerate. About 15 to 20 minutes before serving, bring to the simmer, cover, and simmer very slowly for 10 minutes, occasionally basting the meat and vegetables with the sauce.


Adapted from Julia Child’s “Mastering The Art of French Cooking”

Thanksgiving is in just a few days so here are some Thanksgiving cooking columns and recipes, for one person, a few people or even a bevy.

There are three recipes here: spicy cranberry sauce, make-ahead giblet gravy and sage-sausage stuffing with sourdough bread.

First, the spicy cranberry sauce. Try it; it’s usually a hit.

Next up is the gravy. I like to make my gravy ahead of time, and add in the pan drippings, because there’s nothing worse than not having enough gravy on Thanksgiving. Then again, I love gravy.

Finally, my favorite recipe and a must-have at any Thanksgiving I host: sage-sausage stuffing made with sourdough bread. This is something I’ve developed over time, starting with the sage sausage, and ending up with sourdough bread instruction. The combination of good bread and sage sausage, along with some bok choy instead of celery, puts it over the top for me.

Spicy cranberry sauce

See the spicy cranberry sauce column by itself or see just the recipe

It’s mostly about the taste, but somewhat about the presentation.

Cranberry sauce (or relish) is usually a dish reserved for Thanksgiving, Christmas and any other time you’re serving a turkey.

Whatever the occasion, cranberry sauce is one of the dishes you should make before before roasting the turkey, along with stuffing and most of the gravy.

Now, before you entirely discount this recipe, being spicy, I can attest that it was one of the biggest hits from Thanksgiving 2017. The fact that spice is a part of what would normally be a sweet dish adds some to the allure.

It’s also very easy, although how cheap depends on if you can get cranberries on sale.

It’s essentially your regular cranberry sauce recipe (which will gel in the refrigerator) with the addition of lemon and lime juice, a little ginger and some jalapeños.

The biggest pain in the recipe is making sure to keep mixing the ingredients, while they are on the stove, to keep them from burning.

See just the recipe here

Spicy cranberry sauce/relish

A spicy cranberry sauce that goes well with turkey.
Prep Time5 minutes
Cook Time30 minutes
Course: Side Dish
Keyword: sauce
Servings: 6 people
Author: Wheeler Cowperthwaite
Cost: $5

Equipment

  • Medium-sized sauce pan

Ingredients

  • 1 ¼ cups sugar
  • 2 jalapenos finely diced
  • 1 tsp lime juice
  • 1/2 tsp salt
  • 1/2 tsp chile powder
  • 1 tbsp grated ginger can substitute powdered ginger
  • 12 ounces cranberries
  • 1/2 cup water

Instructions

  • Combine the sugar, jalapeños, lemon and lime juice, salt, chile powder and water in a medium sauce pan and put over medium-high heat. Stir, as it simmers, until the sugar dissolves, about 2 to 3 minutes.
  • Add the ginger and cranberries and bring the combination to a boil.
  • Once it boils, reduce the heat to medium and stir enough so the cranberries do not burn on the bottom of the pot. Continue to simmer (and periodically stir) until the cranberries soften and there is no liquid remaining in the pot, between 15 to 20 minutes.
  • Allow to cool and refrigerate until it’s ready to be used. It will store for two weeks.

Notes

Recipe adapted from David Tanis.

Make-ahead turkey giblet gravy

This make-ahead gravy assures there will be plenty for the meal and beyond
Course: Side Dish
Servings: 1 quart
Author: Wheeler Cowperthwaite

Ingredients

  • 1/2 cup butter More as required
  • 1/2 cup flour More as required
  • 5-6 cups water
  • Turkey giblets heart, liver, gizzard (Chicken giblets work also)
  • 6-10 pepper corns
  • 1 Turkey neck
  • 2 bay leaves
  • 1 carrot
  • 1 onion
  • Salt to taste
  • Turkey pan drippings
  • 1-2 cups Optional: 1-2 cups white or red wine More as required for deglazing
  • 1-2 cups Optional: Chicken or beef broth
  • Optional: 1 celery stick

Instructions

  • Put the water in a medium pot on high heat and set to boil.
  • Add the turkey neck, all giblets (chicken giblets also work), bay leaves and pepper corns to the pot of water.
  • While the water comes to a boil, cut the carrot and onion into quarters and add to the pot.
  • When water boils, cover, turn heat on low and simmer for at least 1 hour but preferably for 2 and 1/2 hours or longer. The longer the simmer, the better the stock.
  • While the stock simmers, either combine the butter and flour in a small bowl or put a skillet on medium heat, put the butter in the skillet and slowly whisk in the flour. Continue to whisk until it begins to turn golden brown. Remove to a separate bowl. This is the roux.
  • When the stock is done simmering, strain the stock and return to the pot it was simmered in. Add chicken or beef stock, if using.
  • Remove the turkey neck, heart and liver from the strainer. Remove the meat from the neck and finely mince. Finely mince the heart and liver. Add back to the stock and throw the rest of the material in the strainer away.
  • Add the roux to the stock. Stir until well combined. Add wine, if desired. Put on low heat and simmer if the gravy is too thin or make and add more roux.
  • If using turkey and pan drippings: Once the turkey has been removed from the pan, add a little water or wine, depending on how much liquid is in the pan, and deglaze over a medium-high heat, scraping the browned bits from the bottom.
  • Add the pan drippings to the gravy and stir until well combined. A little more flour may be required to be added.
  • Freeze or put in the refrigerator if being made significantly ahead of the serving time.

Sage sausage and sourdough stuffing

Sourdough, sage sausage and bok choy are the keys to this simple but delicious stuffing.
Course: Side Dish
Author: Wheeler Cowperthwaite

Ingredients

  • 8 cups sourdough bread cubes dime to quarter sized pieces, which is a little under a pound and half. Rye or whole wheat also make for good stuffing
  • 1 lb. sage sausage
  • 1 cup bok choy, chopped or other vegetable of one’s choosing, such as celery
  • 2 medium onions, chopped
  • 1-2 cups minced parsley

Instructions

  • Preheat oven to 350 degrees if any of the stuffing is to be baked.
  • In a large skillet (12 inches), cook the sausage, separating it into quarter-sized pieces. Once it is almost done cooking, remove the sausage into a bowl.
  • Brown the onions and bok choy (or other vegetables as desired).
  • Add the sausage back into the skillet, as well as the cubed bread and parsley. Mix and continue to cook over medium-high to medium heat, until the bread begins to heat through.
  • Stuff the turkey with the stuffing or put the stuffing into baking dishes.
  • If baking the stuffing alone, bake at 350 Fahrenheit for 40 minutes with a tinfoil covering.
  • Remove the tinfoil covering and continue to bake for 20 minutes.

This year has been a banner one for my garden which has been bolstered by all the time I spend at home, by being the one outdoor space I have to use and by all the extra time I can devote to it that normally I would spend commuting every day.

One of the banner crops that really has pushed its way through the garden, going so far as to knock over a corn stalk, is the zucchini.

Plated zucchini fritters

Zucchini fritters are way, other than bread, to easily use up the abundant crop. Here they are served with zhug, a Yemeni cilantro-based hot sauce, and tzatziki, the yogurt-based sauce.

I have so, so many of them and, I have absolutely no doubt that you, or maybe your neighbor, or maybe just the person down the street, is just like me and drowning in a sea of zucchini.

That’s where fritters come in.

Fritter is a broad term for potatoes, zucchini, fruit, meat, dough, and probably many more things, that have been combined and are fried. In this case, the recipe is kind of like latkes (also called potato pancakes), but with zucchini instead.

The comparison is important because both potatoes and zucchini are jam packed with lots and lots of water that need to be removed before they are turned into fritters. It’s the same process that goes into preparing decent hash browns, although usually hand power gets them dry enough for the skillet.

In this recipe, salt will help drain the water out of the shredded zucchini, with the aid of a strainer. That only gets so much water out, so there is a second step. Either the shreds can be wrung by hand or, they can be balled up into a dish towel and wrung out as the towel is twisted. I find the dish towel applies enough force to get most of the water out.

The other reason I chose to write about fritters is they go great with two other recipes I’ve already shared in previous columns, mainly, tzatzikizhug and hummus. All three make great dips for fritters.


Dill piles up in a container of yogurt being used to mix the Tzatziki.

Dill plays a starring role in tzatziki and it goes great in the fritters as well.  Most herbs would do well as a seasoning but, since I like to pair them with tzatziki, I always reach for dill first. It does not hurt that the dill has also been having a banner year, since it has not, yet, been pushed over or smothered by the zucchini.

One thing that most fritters need is some kind of binder. Here, I use eggs and crumbled feta, as well as a little bit of flour.

When it comes to the frying, use a lot of oil if you really want to go for that deep-fried taste, or use a lot less if you’re using a non-stick pan. I personally use cast iron skillets so a little oil often goes a long way. Alternatively, the fritters could be baked in the oven.


Zucchini Fritters

These zucchini fritters are a great way to use up a bumper crop and go great with tzatziki, zhug and hummus.
Prep Time1 hour
Cook Time30 minutes
Total Time1 hour 30 minutes
Course: Appetizer
Cuisine: Mediterranean
Keyword: fritters, zucchini
Servings: 12 fritters
Author: Wheeler Cowperthwaite

Ingredients

  • 2 lbs zucchini
  • 1 1/2 tsp salt
  • 2 eggs beaten
  • 1/2 to 1 medium onion
  • 4 tbsp minced fresh dill
  • 1/2 cup Feta cheese
  • 2 garlic cloves finely minced
  • 1/4 tsp pepper
  • 1/3 cup flour
  • 1 tsp baking powder
  • oil as needed for pan frying

Instructions

  • Shred the zucchini through the large holes of a grater. Transfer to a strainer on top of a bowl and toss with the salt and let sit for 10-30 minutes.
  • Wring out the zucchini shreds, either by hand or by putting handfuls into the center of a clean dishtowel and twisting the towel. Try to get out as much water as possible.
  • Finely mince the onion or shred it with the grater. Mince the fresh dill and the garlic.
  • Beat the eggs in a large bowl.
  • Heat a large skillet on medium heat and add a little bit of oil.
  • Mix in the zucchini, the feta cheese, the onions or scallions, the dill, the garlic and the pepper. Mix.
  • Sprinkle and mix in the baking powder and flour until well combined.
  • Drop large spoonfuls of the batter onto the skillet, but do not crowd them together. Lightly press down on the fritters with the back of a spoon.
  • Turn when golden brown, about three minutes. After the other side is golden brown, remove to a plate and serve with tzatziki and hummus.

Summertime, and the living is hot, which means cooking indoors is a pain. There is a solution. The grill.

I love grills for a multitudes of reasons. They can be quick, they are outdoors, they are tasty and easy and, in the summer, cooking inside is far too miserable.

That’s where a new take on grilled chicken comes in. Specifically, it is a Thai take on the humble hunk of chicken meat.

Gai yang, also called kai yang or ping gai, or simply Thai grilled chicken, brings together some of the most prominent flavors in the west: lime, cilantro, garlic and chiles.

Thai grilled chicken, or Gai Yang, with steamed rice and a grilled green chile.

The flavors mix, meld and create something worth adding to the regular stable of meat marinades.

I was lucky enough to, most recently, take a return trip to Thailand just on the cusp of the current pandemic. That meant tourism was down and the streets were not nearly as packed as I have seen them in travels past. Although there were fewer people, there were still plenty of street food vendors with small grills and bags of marinating meat.

Many of the grilled foods had two common ingredients: lime and chiles. There is a third ingredient, which smells awful, but really adds a savory, or unami taste: fish sauce. I swear by it in most marinades, where it adds a saltiness and depth of flavor not offered by soy sauce.

It’s an ingredient that is in lots of Thai cuisine but its influence melds into the background, becoming indistinguishable on the palate, except for a sparkle.

Really, gai yang is not that different from a regular citrus marinade, with the exception of fish sauce: cilantro, garlic, lemon and lime.

The original marinade recipe I used as a base calls for chopped lemongrass and cilantro roots. I know finding cilantro with the root still on his hit or miss, and lemongrass is hard to find, so I’ve substituted lemon rind.

Making the marinade requires a good processor or blender and the chicken should sit for at least three hours, if not overnight.

I serve this chicken with some green chiles roasted on the grill and rice.

Wheeler’s Thai grilled chicken

This Thai grilled chicken, or Gai Yang, with a side of roasted chiles and rice, makes a great weekday staple.
Prep Time45 minutes
Cook Time15 minutes
Total Time1 hour
Course: Main Course
Cuisine: Thai
Keyword: grilled chicken, Thai
Author: Wheeler Cowperthwaite

Ingredients

Main

  • 1-4 lbs chicken breasts, thighs or drumsticks
  • 2+ green chiles
  • 1 cup cilantro, coarsely chopped

Marinade

  • 3 tbsp chopped garlic
  • 2 jalapeños, chopped
  • 1 tbsp brown sugar
  • 3 tbsp fish sauce
  • 2+ tbsp lime juice
  • 2 tbsp white or red wine (optional)
  • 1 tsp sesame seed oil (optional)
  • 2 tsp soy sauce
  • 15 sprigs cilantro, coarsely chopped
  • 1/2 lemon, deseeded, coarsely chopped

Sauce

  • 2 dried red chiles, soaked, then coarsely chopped
  • 2 cloves garlic, coarsely chopped
  • 1 tbsp brown sugar
  • 1/4 tsp salt
  • 1/2 cup rice vinegar

Instructions

Marinade and sauce

  • At least three hours prior to grilling the chicken, prepare and marinade the chicken.
  • In a blender or food processor, combine the marinade ingredients. Blend for 2-3 minutes, until everything is well combined. Everything should already be chopped.
  • Combine the chicken and the marinade in a container, bowl or ziplock bag and refrigerate for at least three hours. Overnight is preferable.
  • While the chicken is marinating, combine all of the sauce ingredients in the food processor or blender and mix until well combined. Remove to a separate container for serving and refrigerate until ready to serve.

Grill

  • Grill the chicken over medium to medium-high heat until done. Chicken thighs taken longer than breasts and bone in takes longer than boneless. If the chicken is bone-in, cook over medium heat. Add a little of the marinade to the chicken while it cooks.
  • While the chicken is grilling add the green chiles, cut lengthwise, to the grill and cook until the skin is well blistered.
  • Once the chicken is done, remove from the grill and allow to rest for 2-3 minutes.
  • Serve with rice and the sauce you previously made in the blender/food processor and the roasted chiles.
  • Garnish the plates with the chopped cilantro.

Notes

Serve with hot rice.
Barbecue chicken sauce recipe from Practical Thai Cooking by Puangkram Schmitz and Michael Worman.

Learning a pressure cooker, or in my case, an electric pressure cooker (brand Instant Pot) means trying out new recipes and seeing what it can do.

In the case of chicken noodle soup, the answer is a whole hell of a lot.

When I made it, I went online to see what the general suggestions, and recipe directions/ingredients are for chicken noodle soup.

The best suggestion, which I heeded, was to cook the noodles separately because of the difference in required cooking time.

Other included cubing the chicken before cooking it (for people using boneless chicken breasts or thighs) and suggestions on how much broth and water to include in the pot.

Finally, I was reminded that cooking bone-in chicken means leftovers will be a little gelatinous, from the natural binders in the chicken cartilage.

(See just the recipe here.)

Chicken noodle soup made (mostly) in an electric pressure cooker (Instant Pot). Bone-in skin-on chicken legs were used, as well as green chiles (Anaheim peppers).

I didn’t see any particular instructions on what to do with chicken legs.

Chicken legs are probably the cheapest meat I can get and when I went to the store to get ingredients, they were only $1 a pound, by far the best deal in the store.

They also go on sale for $4 for a 10 lb frozen bag.

If you’re looking for a cheap chicken soup, this is it.

I put the metal steam rack in the bottom, put in two chicken legs, the cut veggies (squash, zucchini, carrots and green chiles), poured in six cups (32 ounces) of chicken broth, a little water, half a bullion cube, locked the lid and turned it to 15 minutes .

After it finished cooking, and I allowed it to “natural release” for 15 minutes, I vented the unit and extracted the first chicken leg with a gloved hand and started taking the meat off the bone and putting into a bowl. Once both chicken legs has been stripped of their meat, I threw them back in the pot and started stirring. Meanwhile, I already drained the pasta and, after realizing everything would be easier in a larger pot, I transferred everything to the pot the pasta had been in.

I added the noodles and realized it lacked salt, so, remembering a Cook’s Illustrated I read on the topic, I grabbed my trusty light soy sauce, my trustier fish sauce and seasoned the soup.

Voila!

Unfortunately, for leftovers, the pasta continued to soak up the broth. I was fine with it, but one could have added a little more.

What did I learn?

Chicken legs or (bone-in) thighs work just fine, so long as you’re willing to fish them out, strip the meat off the bones and put it back in the pot.


Pressure cooker chicken noodle soup

Makes 10 servings

Ingredients

2-3 chicken legs (bone in, skin

6 cups chicken stock (48 ounces)

2 cups water

1 bullion cube (optional)

1 lb carrots

1 medium onion (optional)

1 zucchini, Mexican squash, yellow squash or other squash

2-5 green chiles (Anaheim peppers) or other peppers of choice, such as bell peppers or Poblanos.

1/2 to 1 lb pound mushrooms (optional)

Other vegetables as desired, including celery and garlic

Soy sauce to taste

Fish sauce to taste

Pepper to taste

1 lb noodles

Directions

1. Cut all the vegetables into bite-sized pieces.

2. Place the steamer rack at the bottom of the (electric) pressure cooker, then place the chicken legs on top.

3. Put the vegetables in the pot, followed by the chicken stock, the bullion cube (if using) and the water.

4. (Electric) Set the pressure cooker for 15 minutes. Allow for 15 minutes of natural release, and then vent, if desired. If using a stove top pressure cooker, bring to pressure and cook for 15 minutes.

5. While the soup is cooking, in a medium pot, heat water to boiling. Salt the water, then add the noodles and cook as per directions.

6. Once the soup is vented, or the top can be opened, remove one chicken leg at a time and, being careful not to burn your fingers, with a fork, knife or both, remove the meat from the chicken bones. Cut the meat into the desired-sized pieces. Continue with the rest of the chicken legs. Add the meat back to the soup.

7. Drain the pasta and combine with the chicken soup. If desired, transfer the soup from the pressure cooker to the pasta-cooking pot.

8. Season with soy sauce and fish sauce, until soup reaches desired saltiness.

Although I may not be Catholic, that does not mean I’m oblivious to the dietary changes of those around me come February. (This year, it’s Feb. 14).

In that spirit, I thought it would be best to post a round-up of all the Lent-friendly recipes and columns.


Fish

Grilled swai

Fish tacos

Vegetarian

Hummus!

Zhug

Roasted cauliflower

Zucchini fritters

Ugly beans

Tabbouleh

Tzatziki

Mexican-style grilled corn

Roasted carrot coconut salad

Roasted spicy cumin carrots


Easy to make Lent friendly

Rice bowls. Substitute pork for fish or leave out meat entirely.

The finished green chili hummus, after everything has been blended.

I’ve been a fan of curry pastes for a long time, as well as a fan of buying ingredients in bulk for cost savings.

I don’t just buy curry pastes in bulk. Potatoes, too, as well as chicken thighs when there’s a big sale.

Somehow, and I don’t know how, I alighted on the idea to combine all three of these things. It may have started with pan-fried potatoes, or maybe with oven baked chicken thighs (skin on, bone in). It may have its genesis in yellow curry fried rice, where I first learned that the (Thai) curry paste works incredibly well as a seasoning.

Before I go any further, I need to mention that this dish goes really well with at least tzatziki, and probably zhug as well.

Yellow curry paste!

Irregardless of how it happened, I then used yellow curry paste (the mildest of the pastes) as a seasoning for pan fried potatoes. All of this is being done in a cast-iron skillet, of course.

Finally, I decided that the best of all worlds is to put the chicken thighs on top of the potatoes, and maybe a few other vegetables and then bake to allow the juices and fat to seep into the potatoes, mingling the flavors.

The problem with chicken thighs is they take a long time to cook at a high temperature. It’s not so much a problem as something you need to be aware of going into the cooking process.

(Continued after the jump)

(more…)